

Many garden-worthy varieties of roses are in danger of disappearing. I could give a long rant about the reasons why – but it really is as simple as this: for various reasons, even wonderful roses can fall out of fashion. Sales fall below a certain level and the big nurseries can’t make money propagating them in large numbers, so they fall “out of the trade”.
Here’s where the little guys like you and me come in, and here’s what I want you to do:
- Collect out-of-patent and garden-worthy roses before they disappear from the nurseries
- Take cuttings
- Once rooted, sell them or give them away
- Accept my thanks for keeping old & uncommon roses alive and for sharing the hobby!
Of the actions listed above, numbers 1 and 4 are pretty easy… I suspect if you have any questions, it’ll be about the “taking cuttings” and the “rooting” part. Happily, there’s plenty of information out there about how to take semi-hardwood cuttings of roses (my preferred method). My part is to encourage you to get some experience doing it, and to answer any questions you may have.
Here’s an introductory video I made on the topic:
Some people learn from watching, but I really need to emphasize that the best way to learn propagation is by throwing caution to the wind and just doing it. Get those clippers into your hands and get snipping – even if you’re not sure you’re doing it right. You’ll get a feel for it as you get experience handling the roses and cuttings.
To recap and detail the points on the video:
- Start with clean, sharp clippers. I use a Felco, but any decent quality blades will do as long as you keep them sharp and clean.
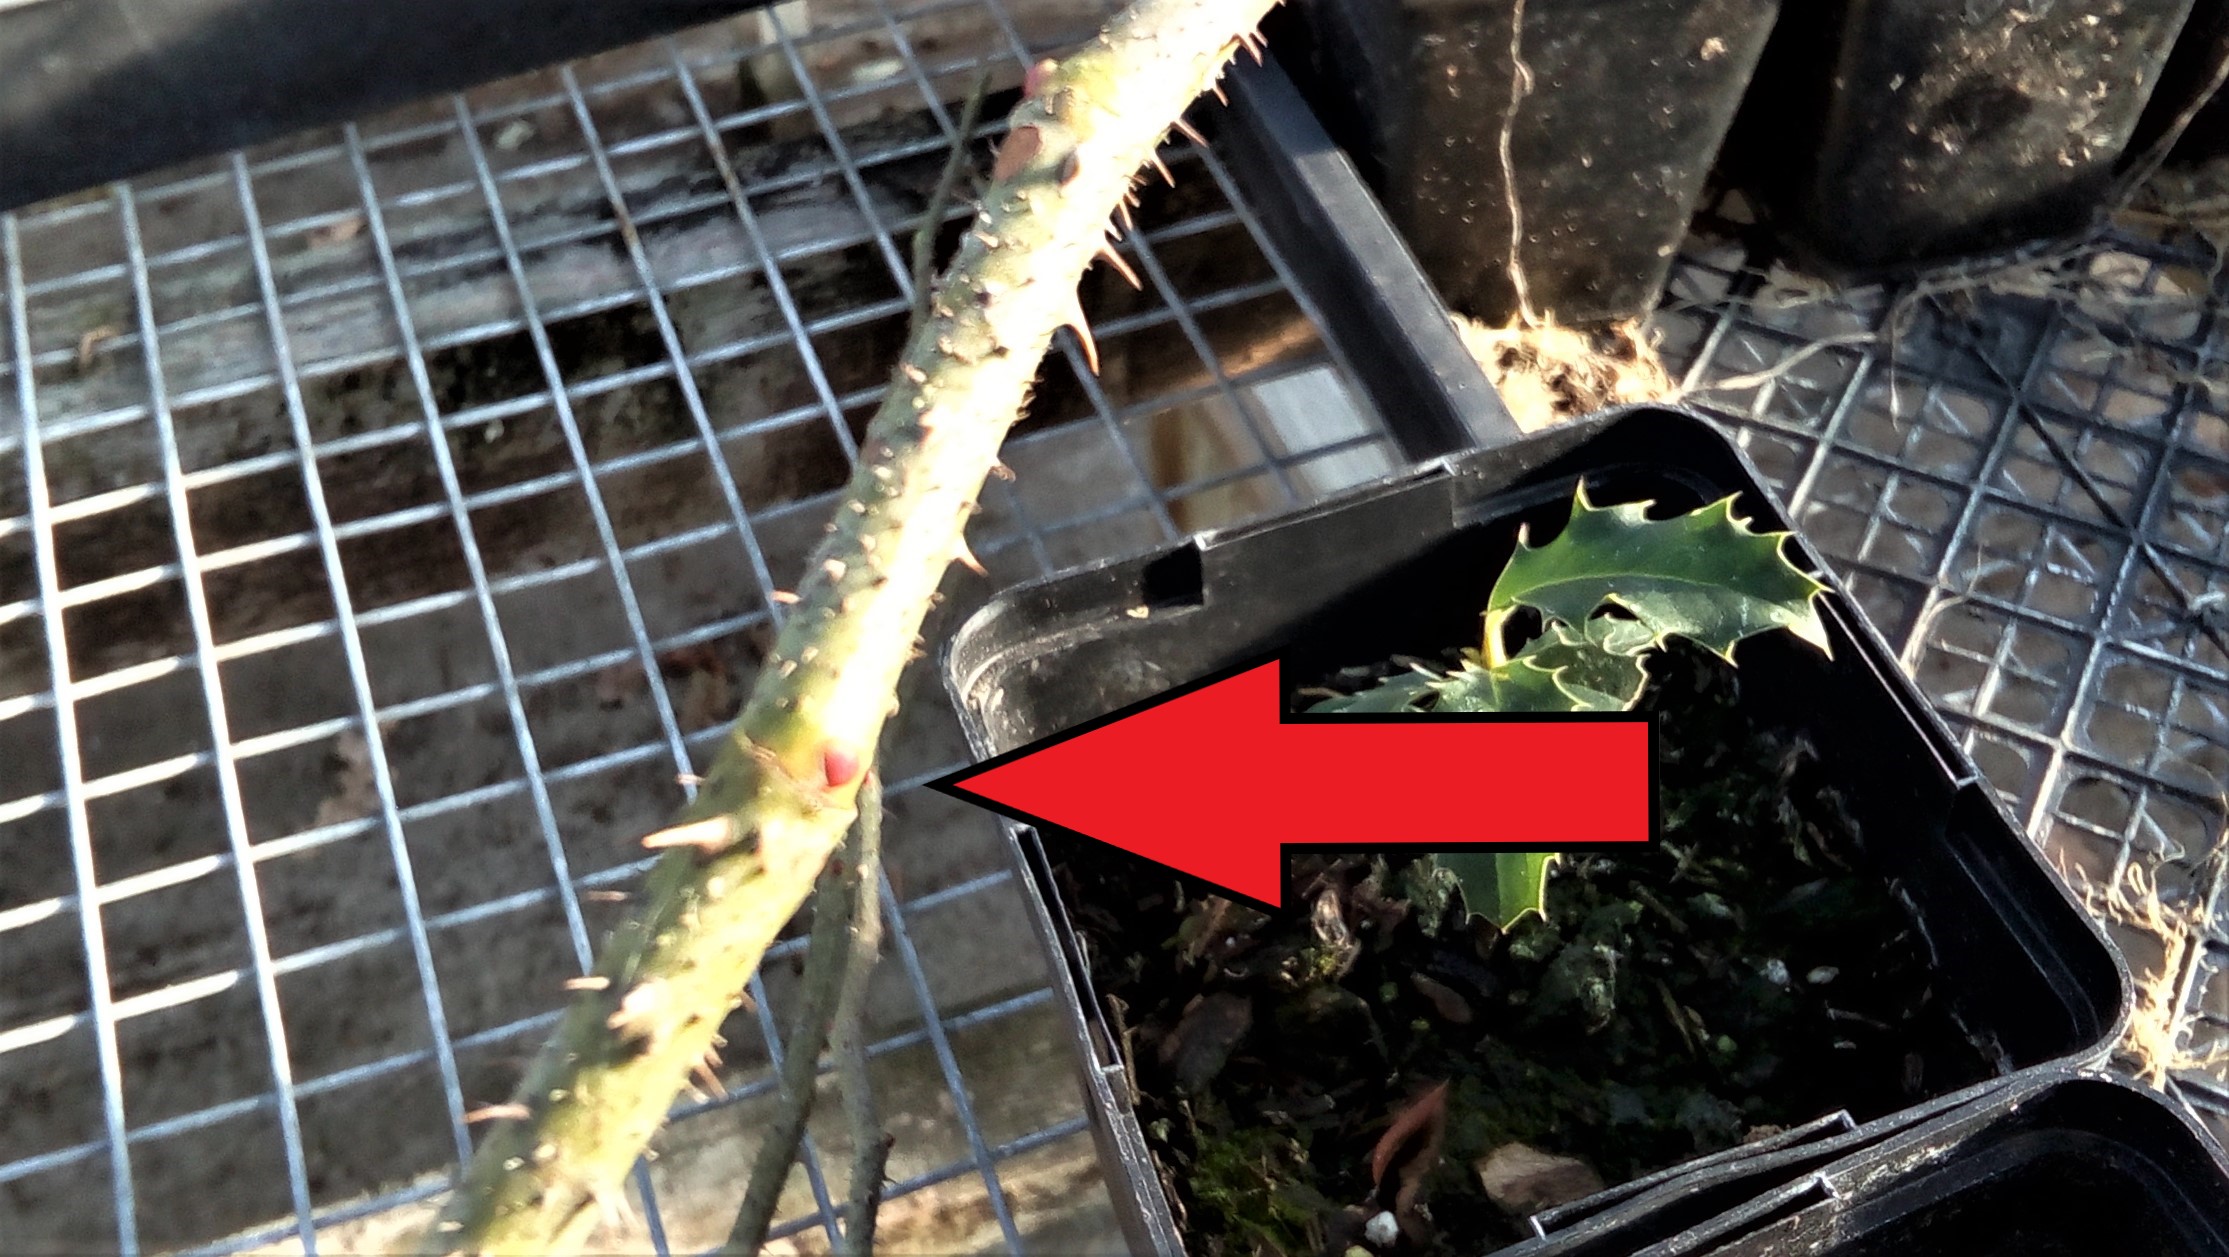
- Select a section of the rose’s stem – a good section has at least 3 or 4 nodes and is somewhere around 4 to 6 inches in length, the thickness of a pencil or slightly thinner. What’s a node? It’s a place where a leaf emerges from the stem. If the section doesn’t have leaves at every node, you can recognize the node by the bud – see this picture as an example:

- It may take some practice to choose the right “firmness” or ripeness of the wood. See in the video for the way I try to bend the stem – if it bends very easily, it’s too soft. If it wont bend without feeling like it will snap, it’s too hard. If you’re not sure, just take and stick the cutting anyhow. Your success rate will tell you if you got it right.
- Cut just below the bottom node, and just above the top node. Strip off most of the leaves. In my cuttings, I leave two leaflets on the top node and that’s all.
- To help with your success, you can dip in a rooting hormone.
- Stick the cutting in a sterile, well-drained potting mix. No fertilizer please. You only have to push it in by an inch or two – just enough to keep it stable and upright under the mist.
- Yes, there are alternatives to mist. I’ve had decent success with a humidity dome or tent in the past. It depends on how many you’re doing. Let me know if you need any tips! It’s important not to keep the cuttings water-logged while they’re trying to root.
- You’ll know your cutting is beginning to “take” if it’s forming white callus along the base of the cutting. Here’s an example:
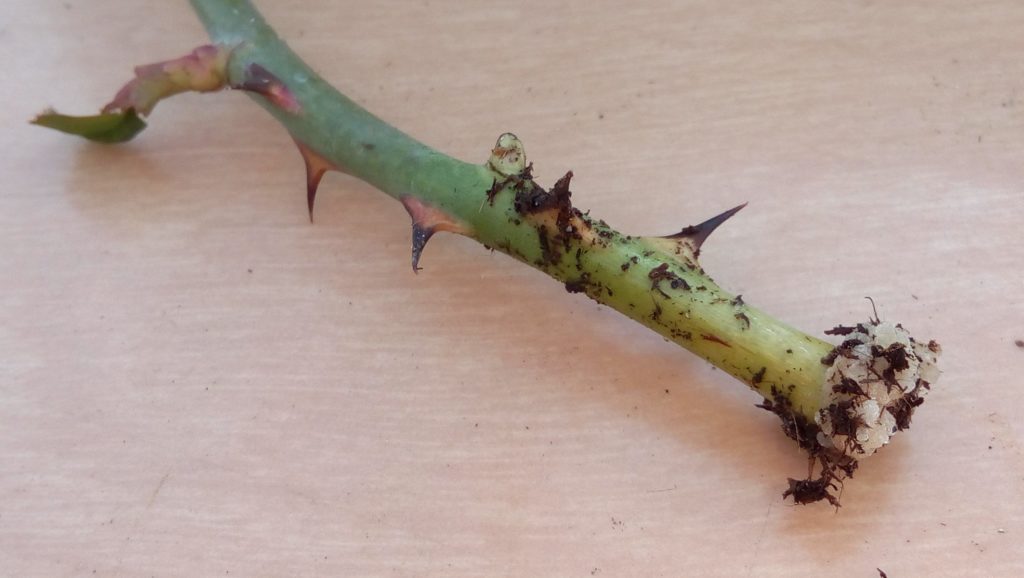
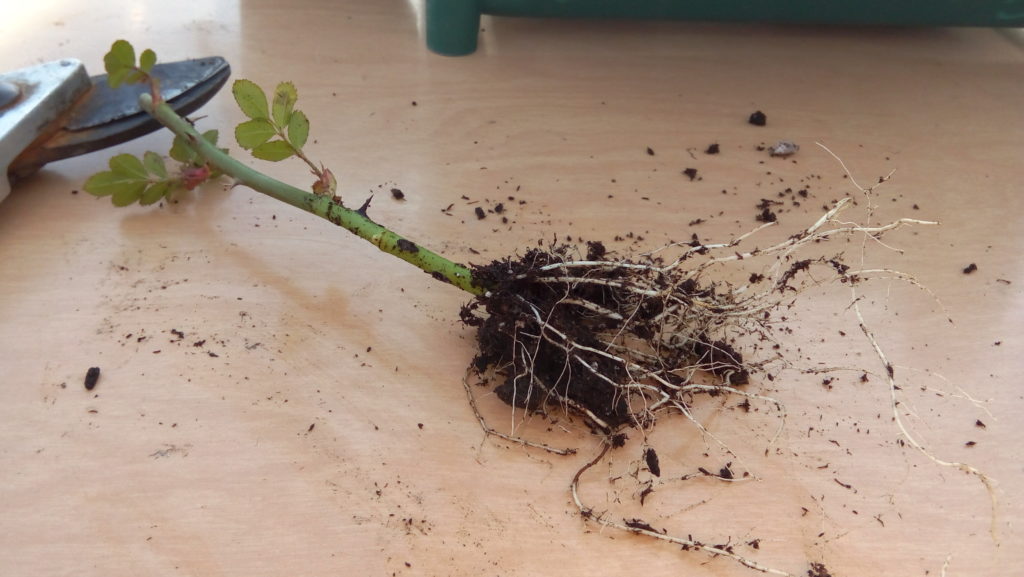
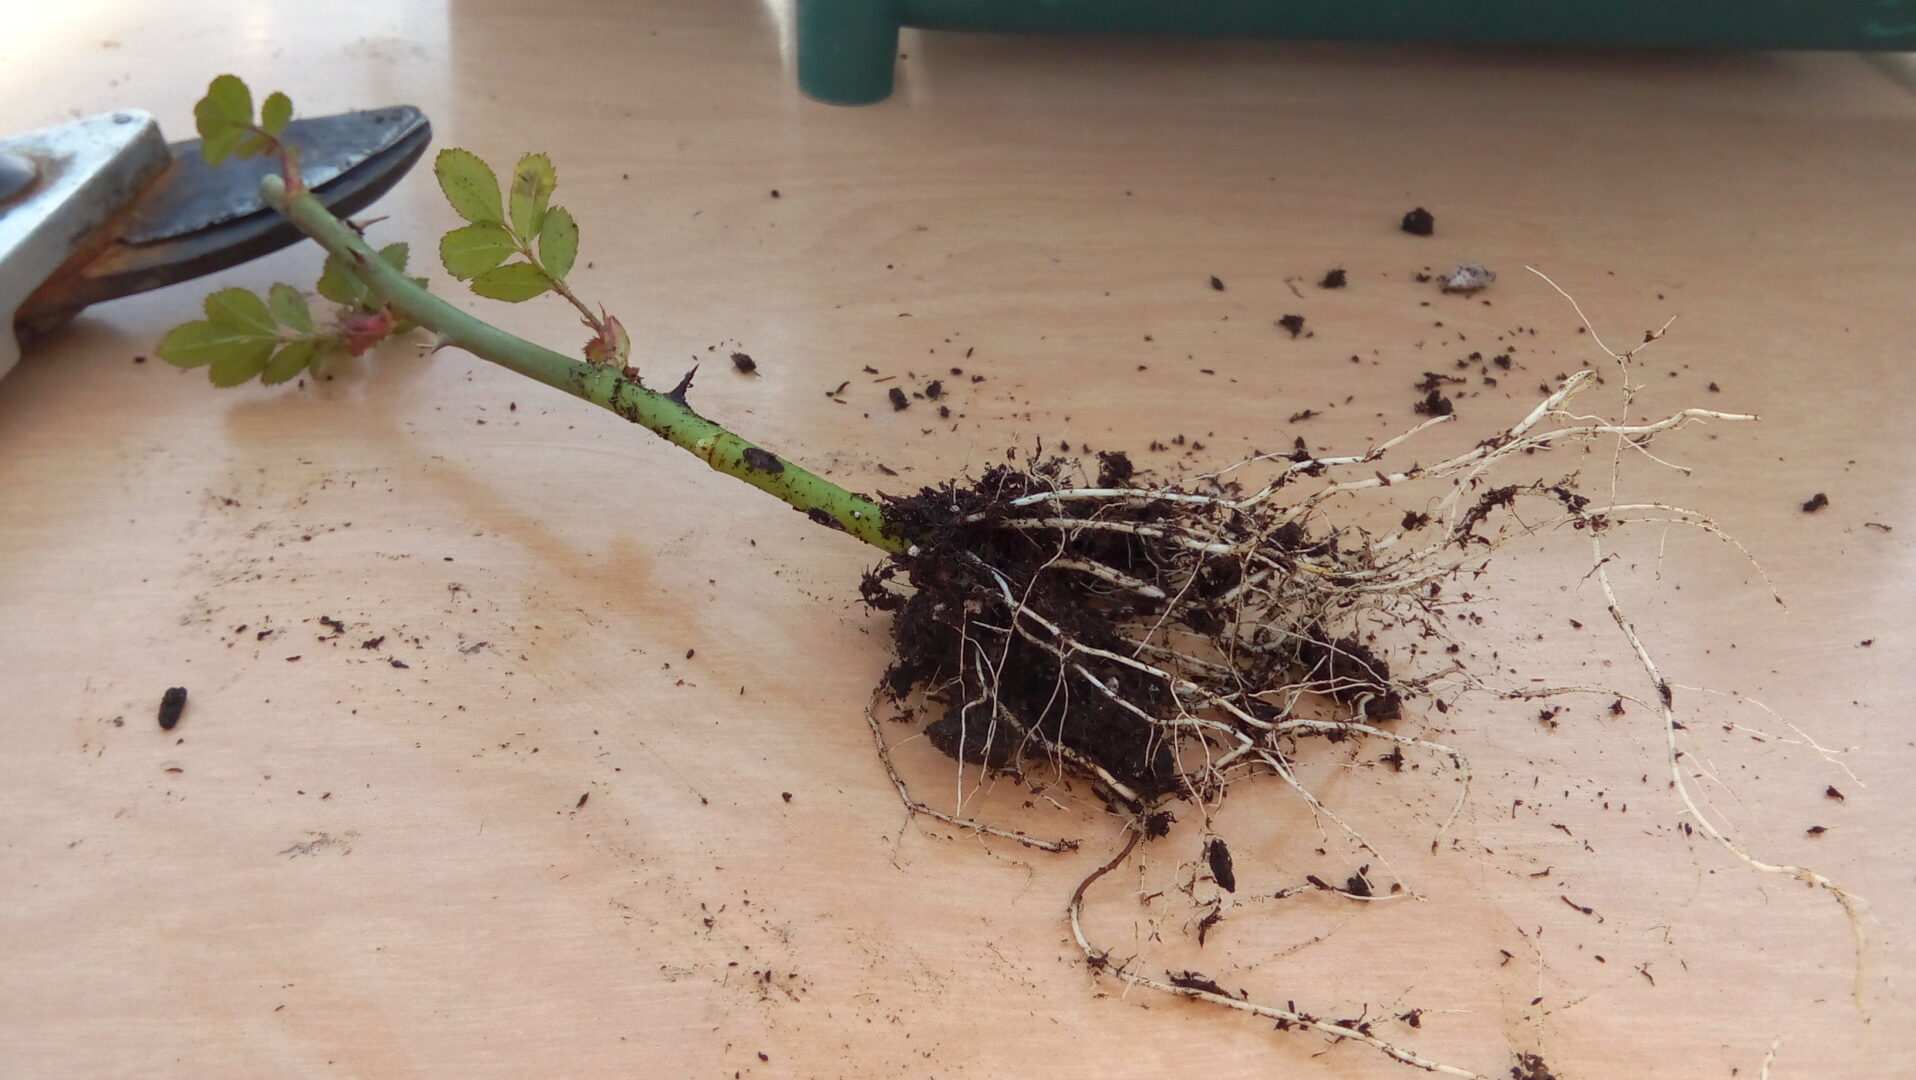
- Reduce the mist / humidity when the cutting “pulls back” when you gently tug upward on it. At this point, the early callus tissue have begun to form roots, as pictured here:
- If you grow in the 9cm size pots I use, you can leave the cuttings to fully root and grow for 6 months, a year, or more before you have to do anything with it. Here’s an example of one I overwintered from last year:
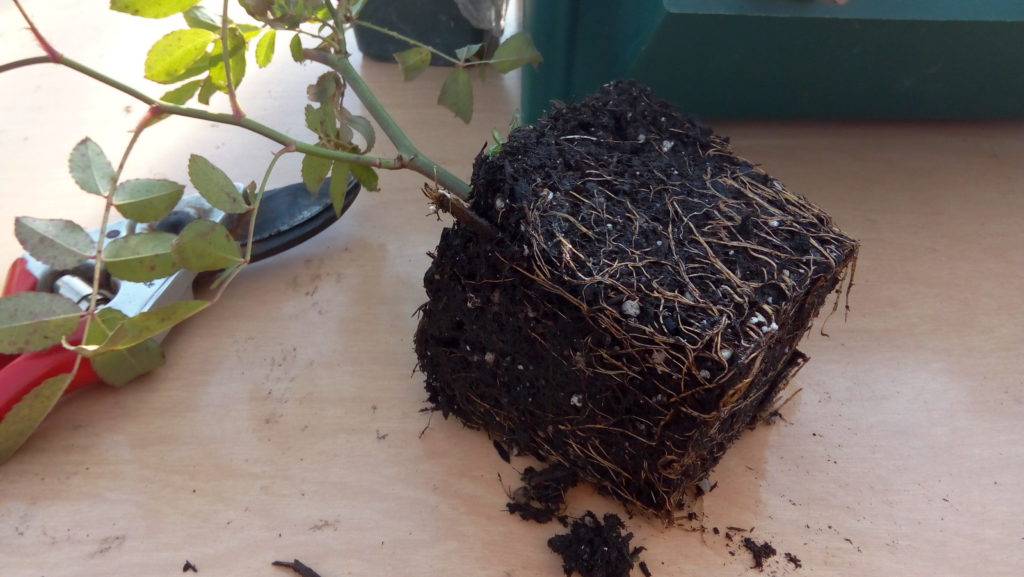
- And that’s it… you have a well-established rose, ready to go into a larger pot or to be sold, traded or given away.


In the time since I first wrote this article, I’ve made several other videos on plant propagation. Maybe the most common viewer request was to show a version with humidity domes rather than timed mist. The cutting technique remains unchanged, but to see an example of the success of humidity trays, have a look at this video where I propagate lavender from semi-hardwood cuttings as well: