Tag: our farm

Build a Rose Arbor with Bent Metal Tube

I would need a fast-forward button to improve my skills at garden design. I could hold the button, and the years would zoom by to show me the eventual size and scale of the trees, shrubs and perennials I’m planting. Somehow, my imagination isn’t adequate to the job. One example of this is in the cedar arbors we installed on either end of our rose garden:

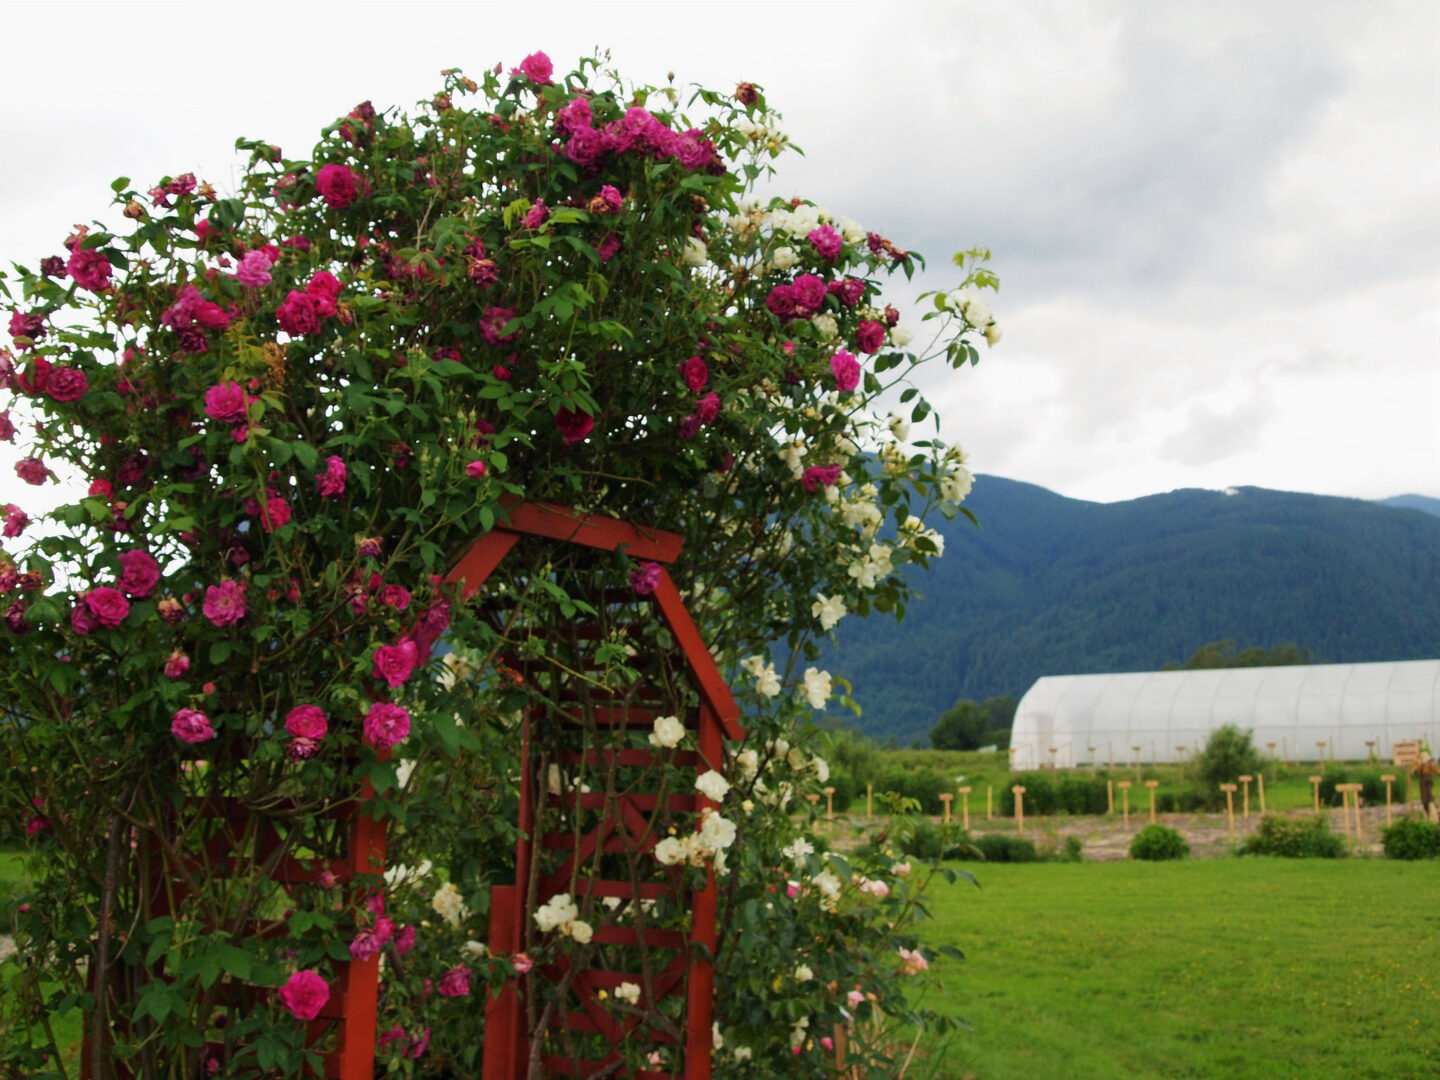
Above pictured are the quite lovely roses ‘Amadis’ (a thornless pink climber) and ‘City of York’ (a thorny beast on the other side of the archway). I guess I knew that they could exceed the height of the arbor when I planted them, but without that fast forward button, I don’t think I grasped quite how out of scale the little wooden structure would look. Quite aside from the looks of it, there then came the stability problems. We tried to shore up the arbors with heavy landscape posts dug in beside them, but under the weight of the plant growth and the ongoing assault of the winds, the structure is struggling to keep standing.

So, my wish-list for replacing them:

  • larger – enough to drive our ride-on lawnmower through, and tall enough to support a 12′ climbing rose
  • stronger – dug into the ground deep enough to support itself against strong South (summer) and East (winter) winds
  • long-lasting – if I use wood, our wet climate will put it at jeopardy of rot. I don’t want to rebuild them any time soon!
  • affordable

A bit of online shopping left me no further ahead. There are plenty of metal or vinyl arbors, but they aren’t much different in size to what I have already. They would also face the same issues of anchoring them into position against our persistent winds. To buy a pair of anything nearly suitable was at the very top end of our budget – without exactly meeting our needs.

Our eventual solution was to build our own, and this video documents our efforts:

The supply list in detail:

13 x black top fence rail (10ft by 1 3/8″) approx. $26 ea. = $338

4 x galvanized top fence rail (10ft by 1 3/8″) approx. $20 ea.= $80

1x 1 liter can of black gloss paint for metal = $20

20x 2″by 5/8″ carriage bolt, nuts, & washers = $15

8x bags of quick concrete mix approx $8 each = $64

2x new drill bits = $20

Total budget: approx. $537 for both arbors

Here is the front one finished (with the old one flat down in the background):

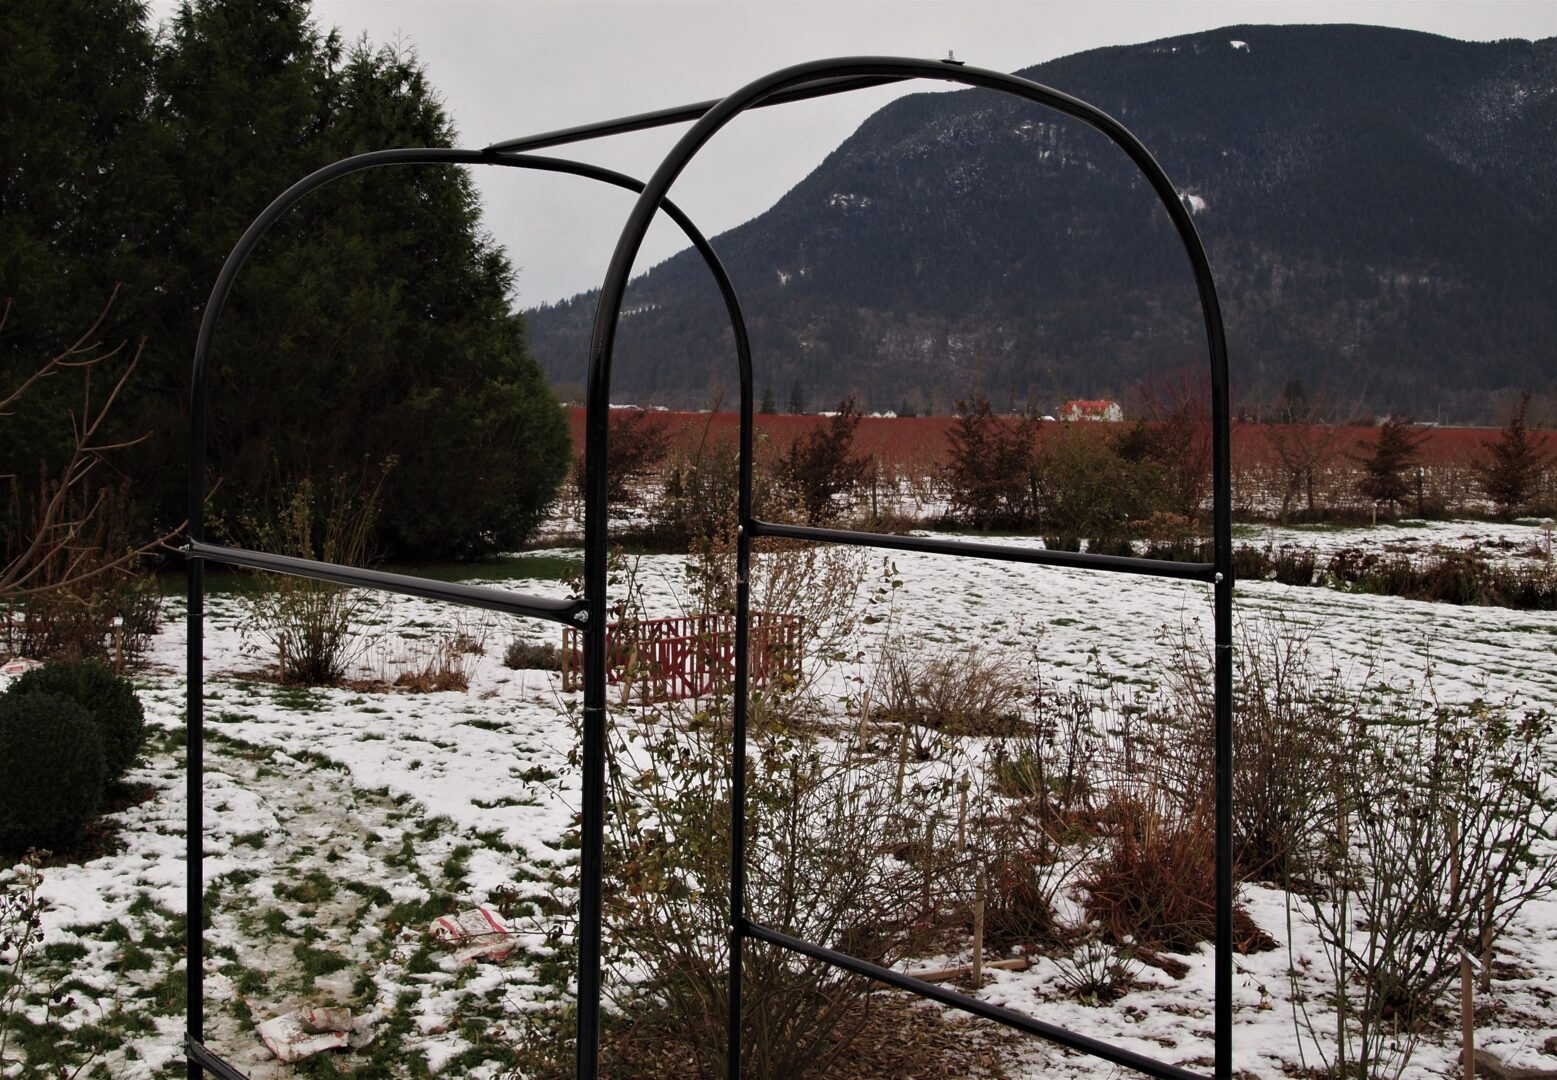
And here’s the back one:

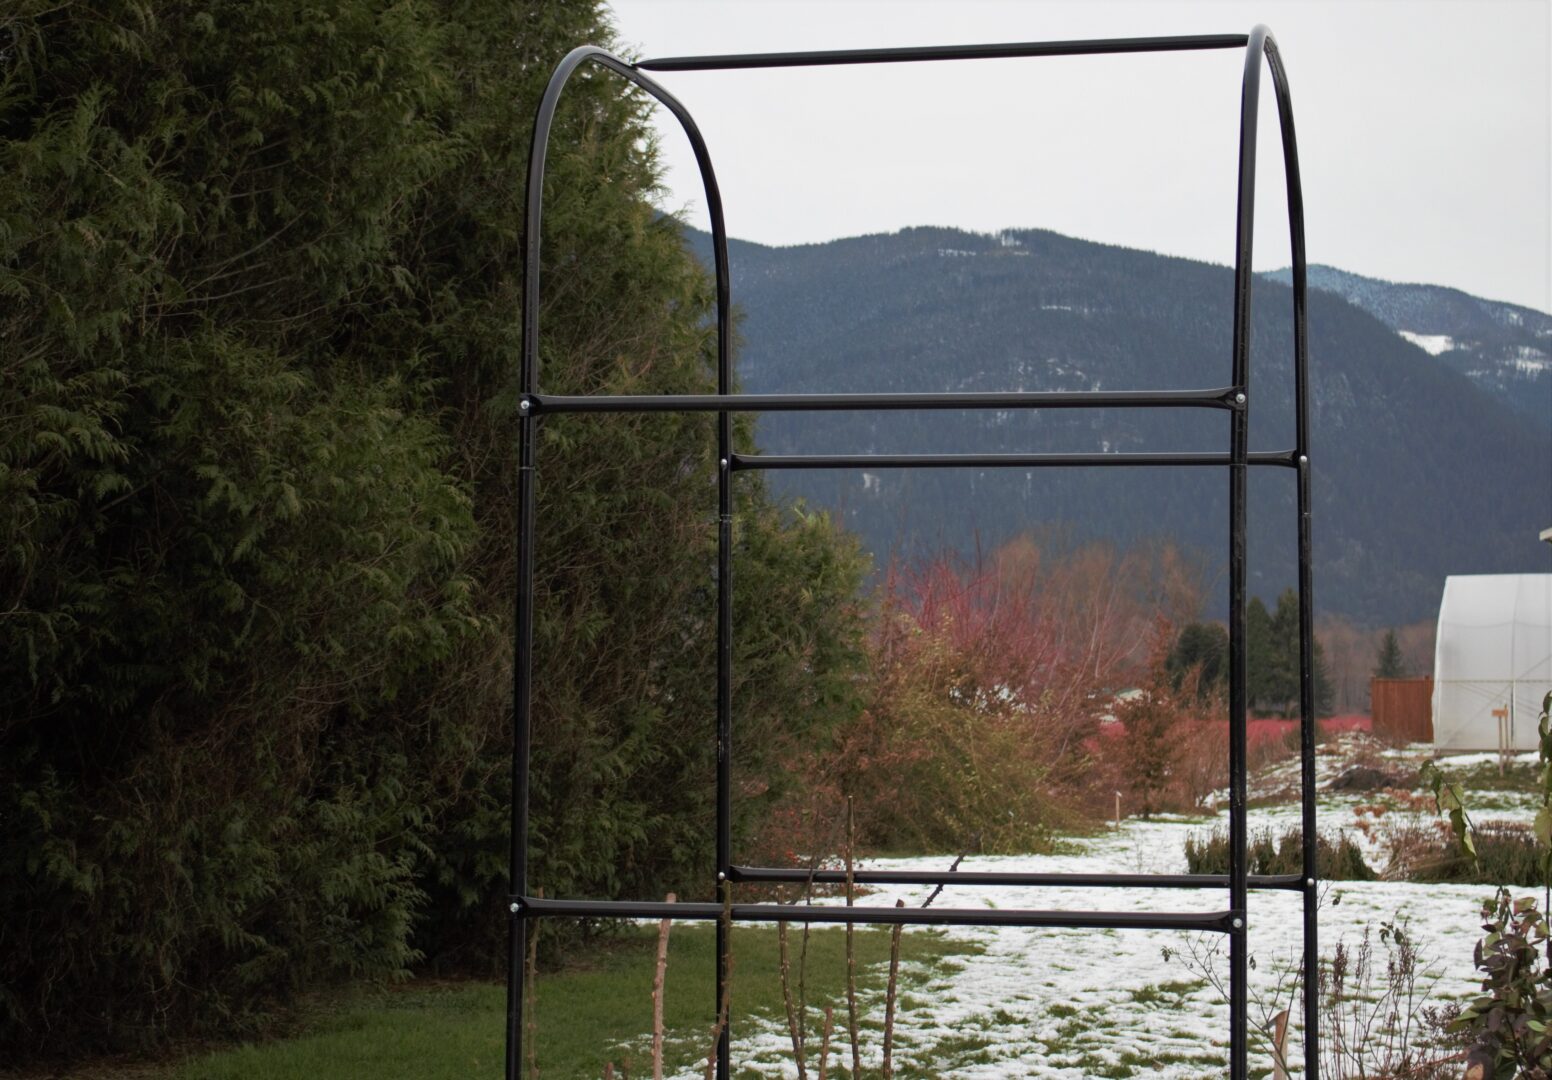
The total height of each arch (above ground) is around 10.5 ft. Additionally, there’s about 3.5 ft of the support posts sunk into the holes and held down with concrete.

Most everything went smoothly, and I’m pleased with the results. They actually look a little larger than I anticipated, but this time I think they’ll be in proper scale with the climbing roses, so it’s just going to take a little time until they’re grown over and blend better with the landscape.

The only difficulty I really had was with the drilling (which took a lot longer than I thought it would) and I also had to accept that there would be imperfections along the way – everything is built, cut, bent, drilled and painted by hand. There are flaws that (I hope) are only visible to me, and will, in any case, be pretty hard to spot once the roses grow over.

One last note that I would make is that the large size of my arbors really did determine the budget. If you scaled down the cross bars to 3 1/3 ft (down from 5), and reduced the height / buried portion, you could easily get the budget down below $200 per arbor.

As for the time involved, it took me about 2 weeks from start to finish – not full-time, of course, but evening hours and weekend days. The most time consuming part was the drilling (2 to 3 evenings) and painting of the arches (2 evenings). The project happily wrapped up on Christmas eve, just in time to clean my work area before having holiday guests over!


Winter Garden Plants

Winter Garden Plants

For the front garden, we decided on a fairly tight theme: plants chosen for their fall and winter features. You might think that this plan would feel restrictive or limiting, but I actually found it to inspire my creativity. I started by ordering a few varieties of willow, with their colorful winter stems. That led on to other plants with interesting stems and bark, and then on to plants with colorful berries, blooms or foliage through the cold season. In this post, I’ll list some of the best small trees, shrubs, and perennials for winter color.

Here’s a video tour of the garden as it stands going into winter of 2017:

Stems and Bark

Both dogwoods and willows display brightly colored stems after their foliage drops in the fall, and that color often intensifies over the following months. We selected 5 varieties of willow and 3 dogwoods for the front garden. They all put on their best color on first-year growth, so I recommend a low annual spring pruning.

  • Salix x. ‘Flame’
  • Cornus ‘Midwinter Fire’
  • Salix rubens ‘Hutchinson’s Yellow’
  • Cornus ‘Winter Flame’
  • Salix alba ‘Chermesina’
  • Cornus sericea
  • Salix matsudana tortuosa – red corkscrew willow
  • Salix alba ‘Britzensis’

To round out the bark colors and textures, I also added:

Paperbark Maple – photo by Derek Ramsey
  • Acer griseum – paperbark maple, for its ornamental peeling trunk
  • Rubus thibetanus – ghost bramble, for its striking white canes
  • Lagerstroemia indica – for its patchwork of stem colors

Flowers for the Winter Garden

At first consideration, I would have been pressed to think of many plants that carry flowers through the cold of winter. We started with the late winter blooming Witch Hazel ‘Jelena’, but then expanded my definition to include shrubs and perennials that flower late into the fall or push the boundaries of early spring. Pictured is Mahonia intermedia, and our other selections are listed below:

  • Mahonia intermedia
  • Helleborus hybrids
  • Hypericum – St. John’s Wort
  • Schizostylis coccinea
  • Hamamelis ‘Jelena’
  • Ribes sanguineum – flowering current, for very early spring
  • Viburnum ‘Dawn’
  • Sarcococca confusa – Himalayan Sweet Box
  • Bergenia cordifolia

Berries

I’m going to have to include roses in this category, because their main winter feature is their fruit. I chose these three for the winter garden:

  • Rosa davidii – which also has deep red colored stems
  • ‘Ballerina’ – a hybrid musk with a veritable cloud of small hips
  • ‘Magic’ – a not-so-miniature mini rose with great fruit

Some of the most exciting color for the fall and winter garden comes from brightly shaded berries like these:

  • Callicarpa americana
  • Ilex aquipernyi ‘San Jose’
  • Hypericum – for the fruit as well as flowers
  • Callicarpa bodinieri

Foliage and Form

I still have some space in the winter garden, and my plan is to spend it on some of those evergreens and structural elements that tie a garden together when most of the other foliage has dropped. So far, I’ve planted:

  • Cephalotaxus fortuneii
  • Buxus ‘Winter Gem’
  • Abies koreana
  • Thuja occidentalis ‘Teddy’

The holly (Ilex) and himalayan sweet box (Sarcococca) listed above are also evergreen, and could be listed in this category as well. In addition to these conifers and broadleaf evergreens, I’m pondering the addition of ornamental grasses, which can hold their structure well in the winter. Even a deciduous shrub like Euonymus alata (burning bush) can add an architectural quality due to the cool way it accumulates snow atop its winged branches.

I’ll run out of space before I run out of plants

My one conclusion from designing this garden is this: once you start looking, there are plenty of plants with interesting winter features. There’s definitely some call for winter-blooming bulbs, ultra-early perennials, and the list of conifers with striking foliage is massive. I’ve made good progress in deciduous plants with colorful stems, but even within the willow family, there are another 3 or 4 I’d like to wedge into the beds somewhere. I’ll be making videos as the garden matures and fills in. If you’re interested, you can subscribe to my Youtube channel to get the updates. If you have any suggestions, I’d be happy to hear those as well.


Putting in our rose garden

Generally speaking, I don’t need to have much of a reason to put in a new garden bed. When we moved onto the farm in 2011, the greater portion of the yard was something like 2 full acres of lawn, so I knew it wouldn’t be long before I started carving some of it out for plantings. I did hesitate, however, to do a rose garden.

I know it may be a bit funny for a guy who is now growing and selling roses, but I’ve always viewed the dedicated rose garden with some suspicion. Raised beds – geometric shapes – formality – bedding roses… lots and lots of bedding roses, with their bare canes angling out unattractively from a bare tarmac of landscape mulch – it’s what I’ve seen in dedicated rose gardens before that runs counter to my gardening style.

Still. I. Must. Garden. And if I’m going to grow primarily roses in my greenhouses, I’ll need to have a place to show some of them off.

I started by looking at some pictures and taking out some books from the library. I tried to keep an open mind about what kind of rose garden would show the plants off most effectively. Unexpectedly, at least to me, I decided on something a bit formal for the bed layout.

It’s a fairly large circular bed with lawn on the inside and outside. Lisa and I re-purposed six boxwood shrubs that we found in an overgrown part of the yard. We planted them in the center of the inner lawn, around what will likely be the most expensive plant in the garden, a red horse chestnut tree(Aesculus x. carena ‘Briotti’) that we picked up at Cannor.

We put in arbors on either end of the garden (I know, I know – there’s no “end” on a circle – but that didn’t really stop us). We put in some plastic edging to stop the lawn from creeping in, dumped a pile of yard waste down to smother the grass.

Here, have a look:

Big doughnut rose garden


The neighbor’s field of blueberries is that bright red in the background. Sort of steals the show this time of year.

I dug in the obligatory climbing rose for the sides of each arbor. ‘City of York’ and ‘Amadis’ for the front, ‘Polka’ and ‘Souvenir de Docteur Jamain’ at the back. That leaves plenty of space to fill in the big empty semi-circles that connect them.

Aside from the geometric layout, I’ve decided to play it pretty casual for this garden. I immediately planted a couple of Buddleia x. weyeriana shrubs on either side of the front arch, and a couple of Leycesteria formosa to frame the back arch. I have to admit to being quite eager to get some non-rose plantings in the ground, as if a delay might jeopardize my resolve to mix the roses with other shrubs, perennials and herbs. Rather than a dedicated roses garden, my current plan is to make it a mixed border that will happen to feature a large number of roses.

I recently visited the rose garden at Fraser River Heritage park in nearby Mission. Not a bad little garden, but a chuckled a bit when I saw the sign asking visitors not to touch the roses. Frick. You may as well go to a gallery to see still-life paintings. If the garden is any kind of an art form, the advantages of the medium include its changing nature, imperfection, and interactivity. You should touch the roses, hopefully not in the pokey places. You should smell them too. If anyone reading this site is ever moved to visit my rose garden (hopefully after a season or two, when I’ve filled it up a bit) I may insist that you pluck a rose or two for yourself. That’s the beauty of working with a living medium… if your interaction should change it, that’s expected. More roses will grow. It’s what they do!