Tag: overwintering

Assess Winter Plant Damage

Assess Winter Plant Damage

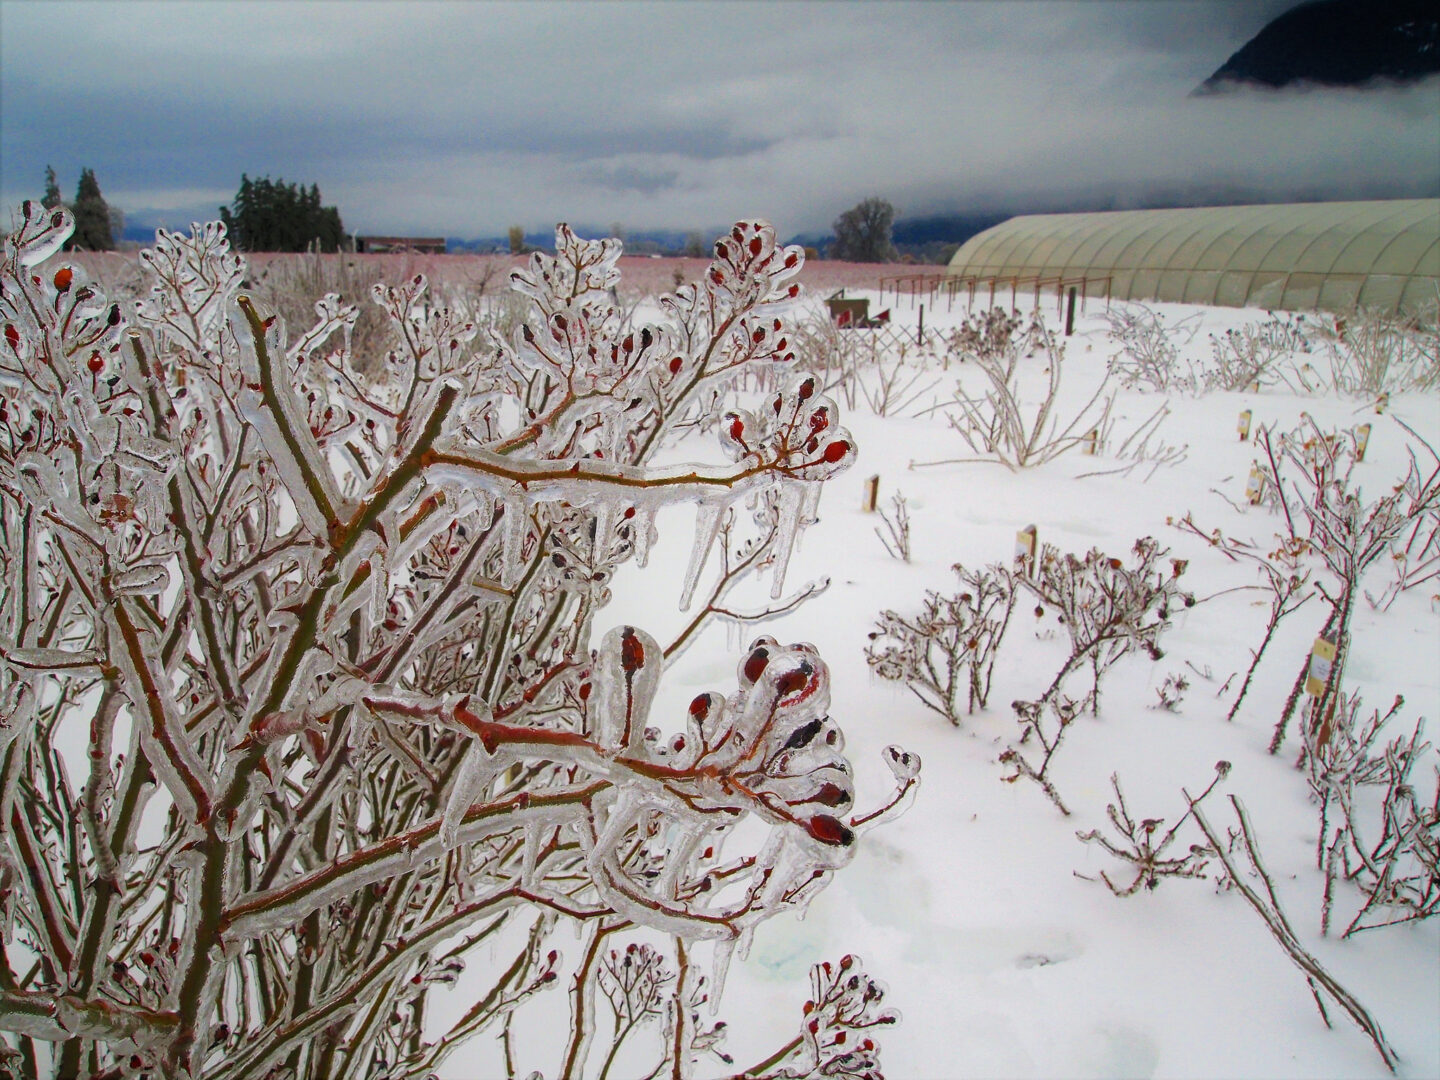
Perennials, shrubs and trees are meant to be the enduring framework of your landscape through the seasons, so chances are that you chose them with your climate in mind. One particular criteria gardeners often use for their selection is the hardiness zone rating. It’s not a perfect system – and there are several other reasons why your plant could take winter damage – but the cold hardiness zones (and their familiar maps) offer at least some guidance about which plants should survive your winter.

Here’s the problem: not all winters fit predictably within allotted zones. If you’ve ever had a much colder winter than average, especially one with strong winds and not much snow cover, you may come out the other side wondering which of your “permanent” plantings survived. In this quick article, I’ll try to offer some guidance on how to assess the cold damage to your plants – after the ice and snow melts, that is!

Patience…

Some plants are enthusiastic to push flowers (witch hazel, for instance) or leaf buds as soon as temperatures will allow. Others are notoriously slow and cautious – I use the example of hardy hibiscus (Hibiscus syriacus) which keeps its winter color and form with no signs of life until weeks later than everything else. Unless you have some pressing timeline (renovations, pending landscaping project, moving) I’d suggest you hold off the stress for a few weeks and give the plants an opportunity to show up for work.

Color

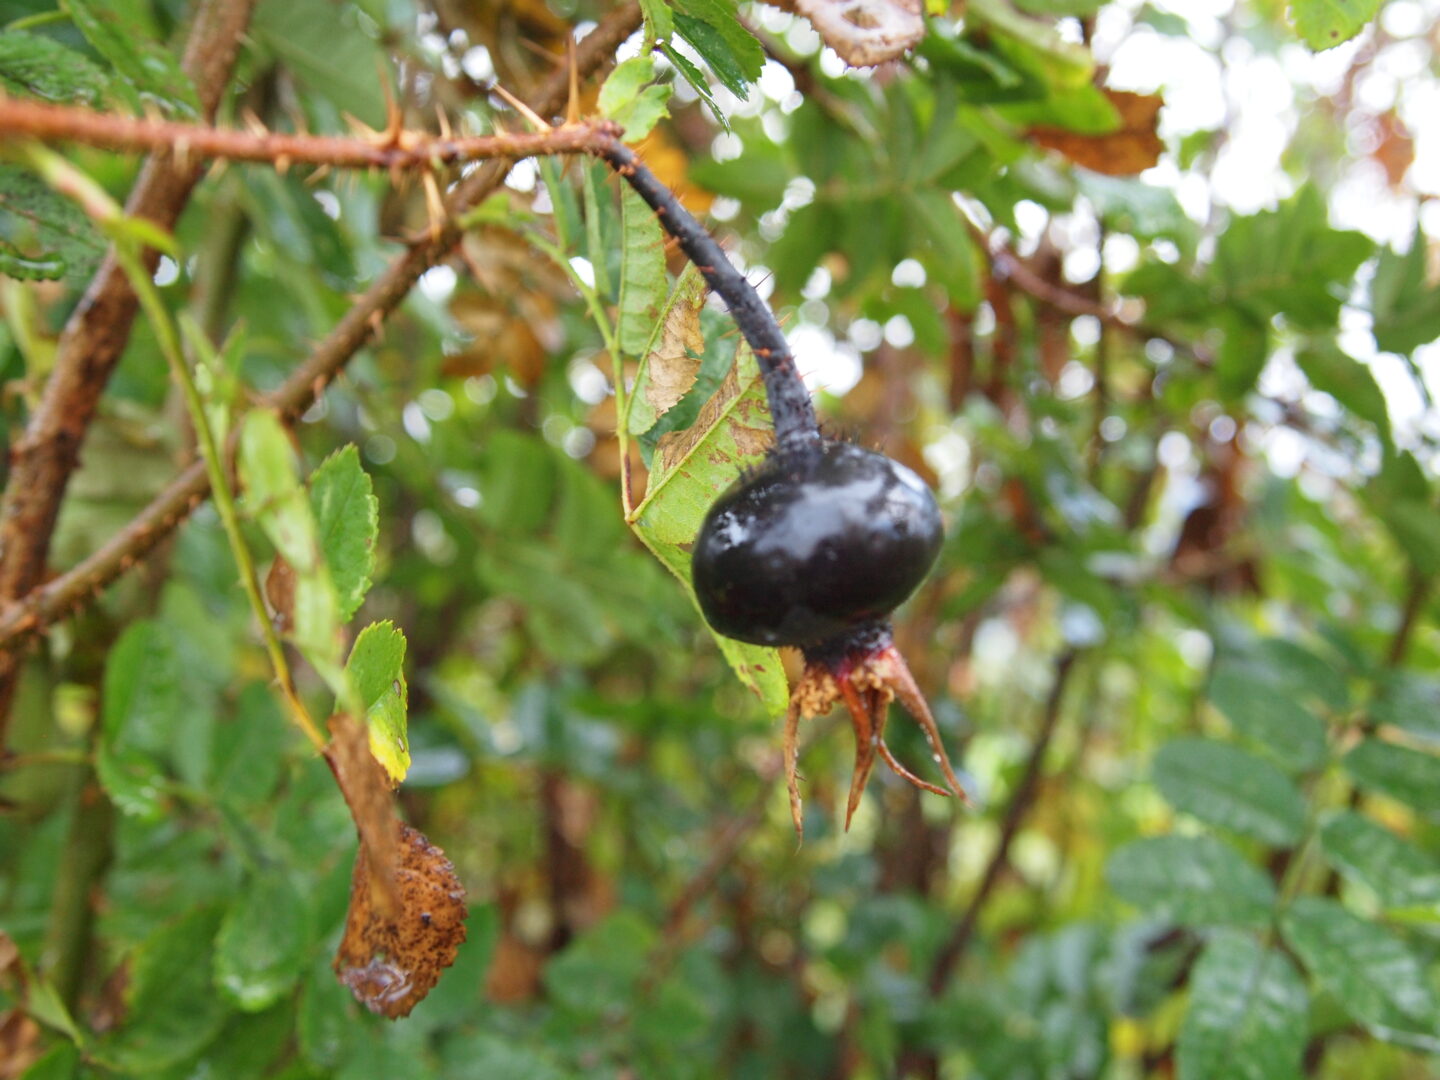
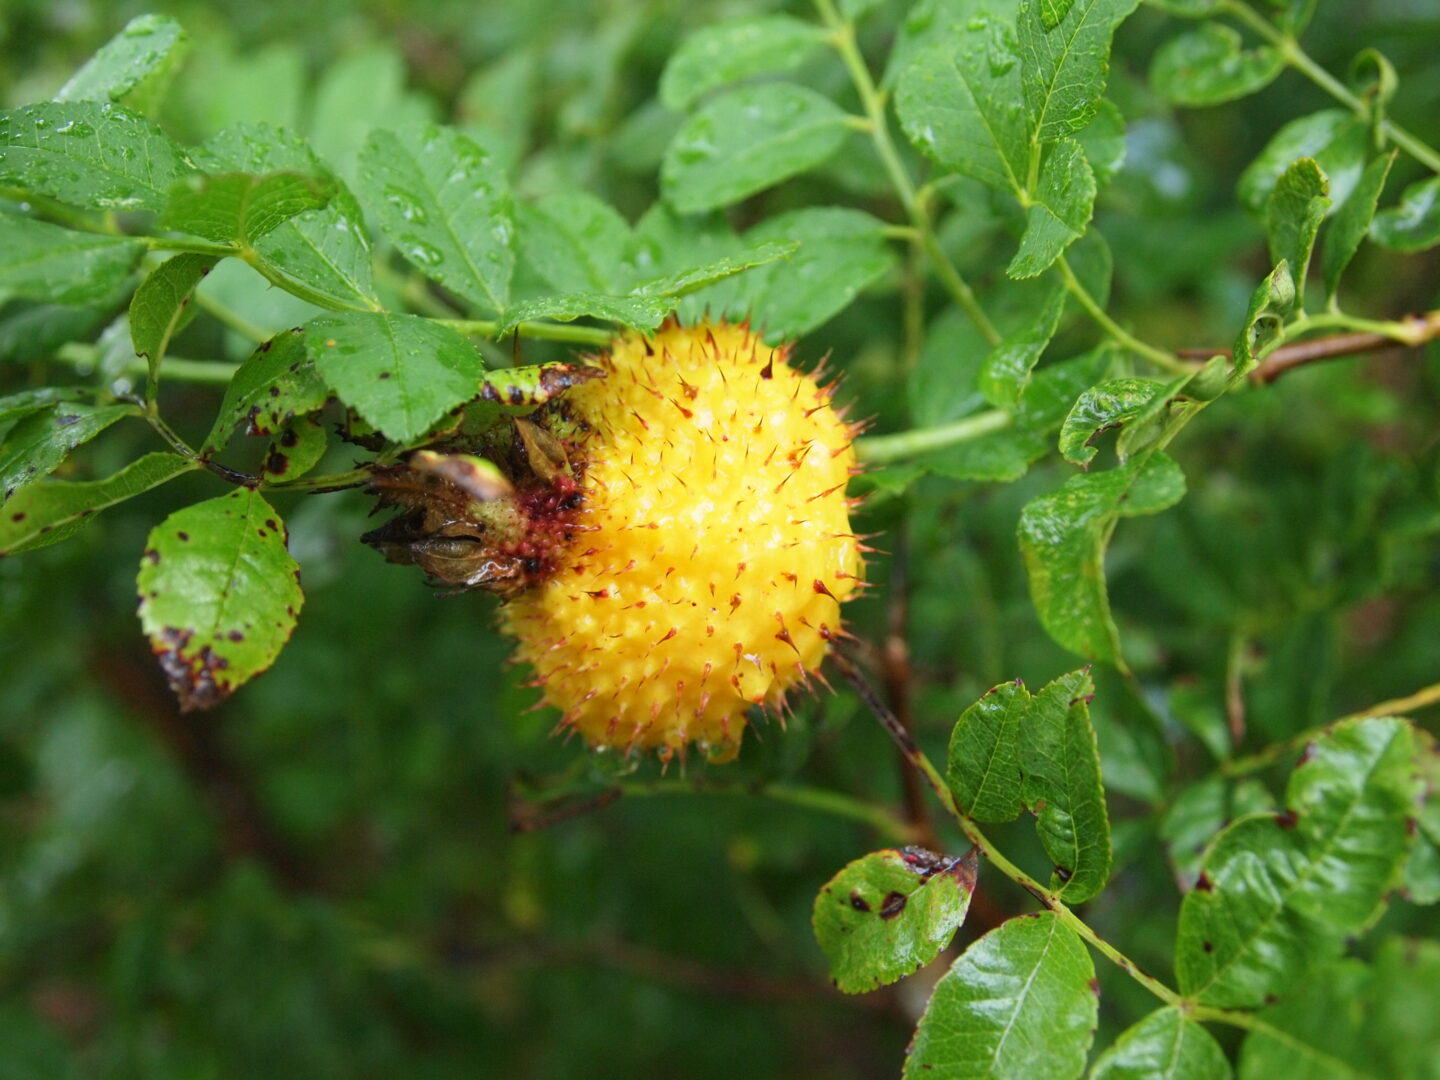
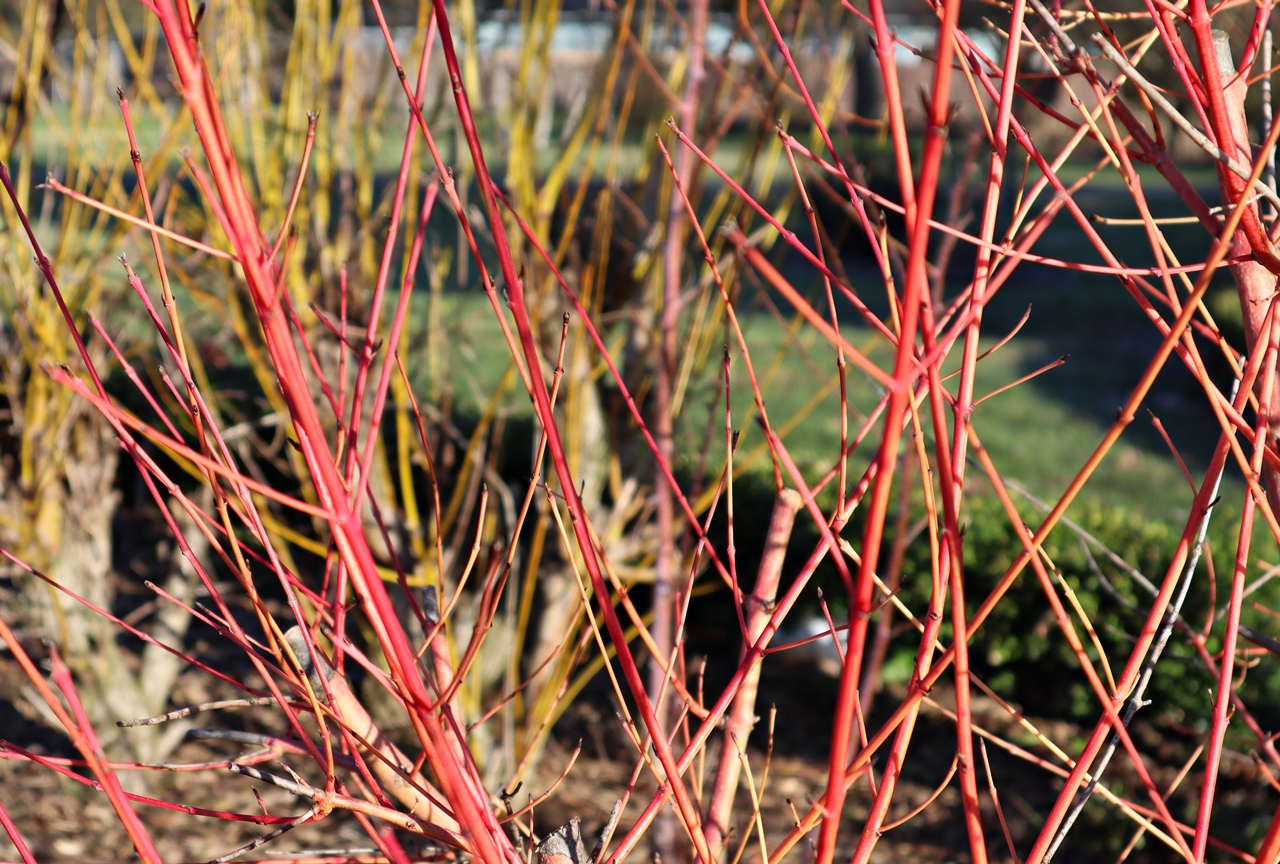
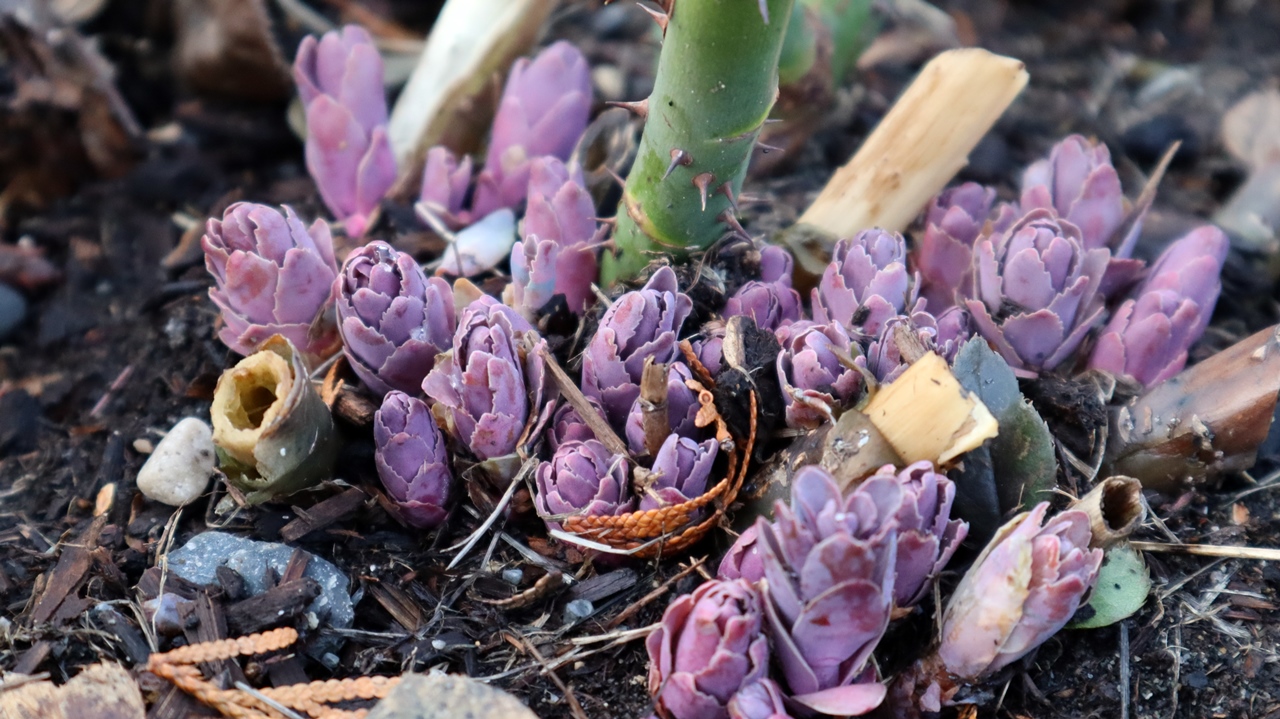
This won’t be as obvious for every plant, but generally the first signs of activity come from changes in the color of buds or stems. Shades of purple, pink, red, orange, yellow and (obviously) green are all hopeful signs that all is well with the plant.

Red dogwood or yellow willow stems are more obvious, but many plants display a color change as they prepare to break dormancy

On the other hand, if the buds and stems seem to be deepening into dull shades of dark brown, grey or (especially) black it can be a warning that there’s been tissue damage in that part of the plant. I wouldn’t use this as a final evaluation of a plant – and I give more details in this video:
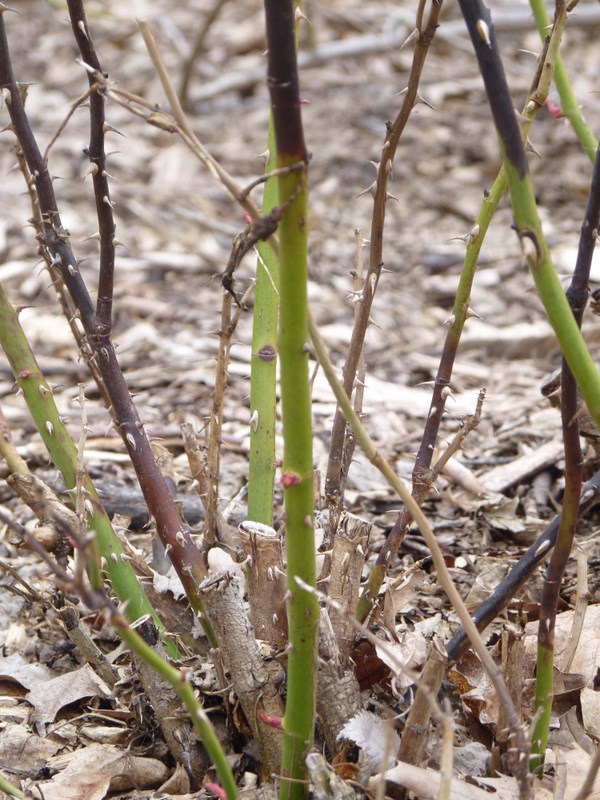
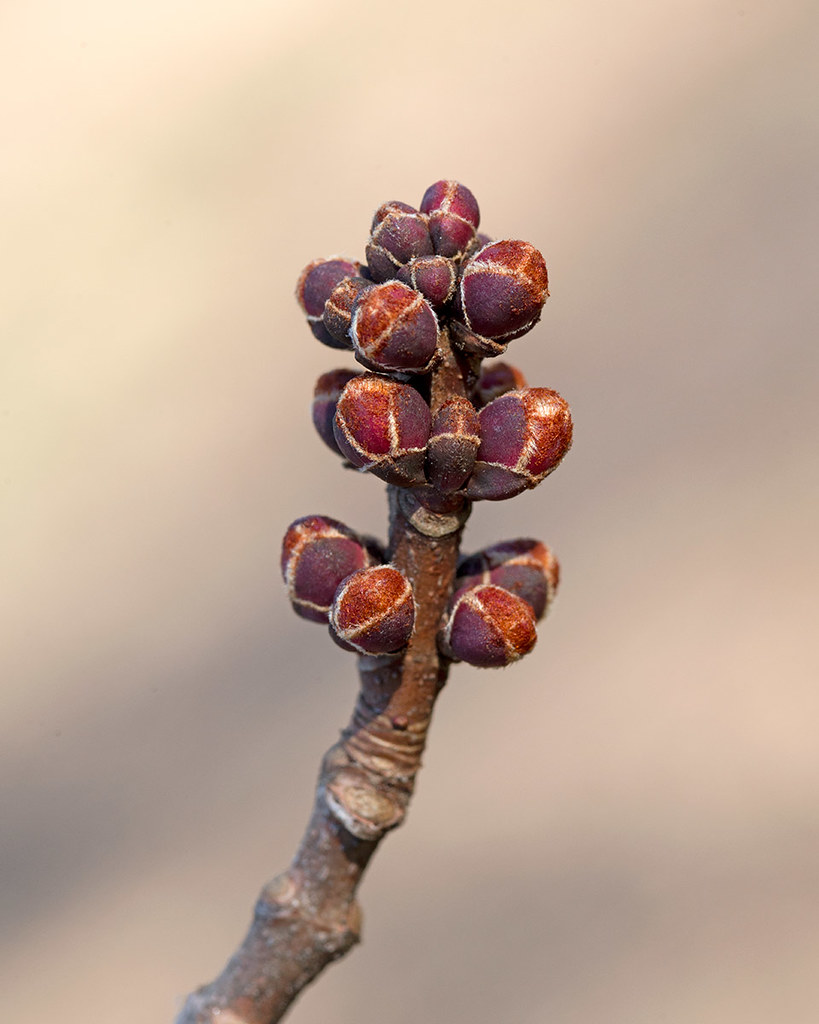
Buds

Beyond color, I’m also looking for changes in the size and shape of the buds. Over the winter, the dormant buds are smaller, and usually held relatively tightly to the stem. Here’s an example from a sugar maple tree:

Photo by Plant Image Library CC BY-SA 2.0

When preparing to break into spring growth, in addition to any color changes these buds will begin to enlarge in preparation for developing shoots or flowers:

Photo by Plant Image Library CC BY-SA 2.0

For perennials, you can often look for the same changes, but you’ll have to gently tease away the soil and mulch from around their crown to see if the shoots are elongating or taking on a spring color.

I mention these changes to the color of stems and the size and shape of buds because they’re visual and can set your mind at ease without causing any damage to the plant. However, if you’re eager to get an answer and your plant isn’t showing any outwards signs, it may be time for a more hands-on approach:

Scrape or Snap

This next test is something landscapers are not hesitant to perform if there’s any doubt. A little scratch with a pruning blade (or even thumbnail) will reveal the color and condition of the inner bark. Green – in all it’s variations, including pale greenish yellow and nearly white – is what you’re looking for.

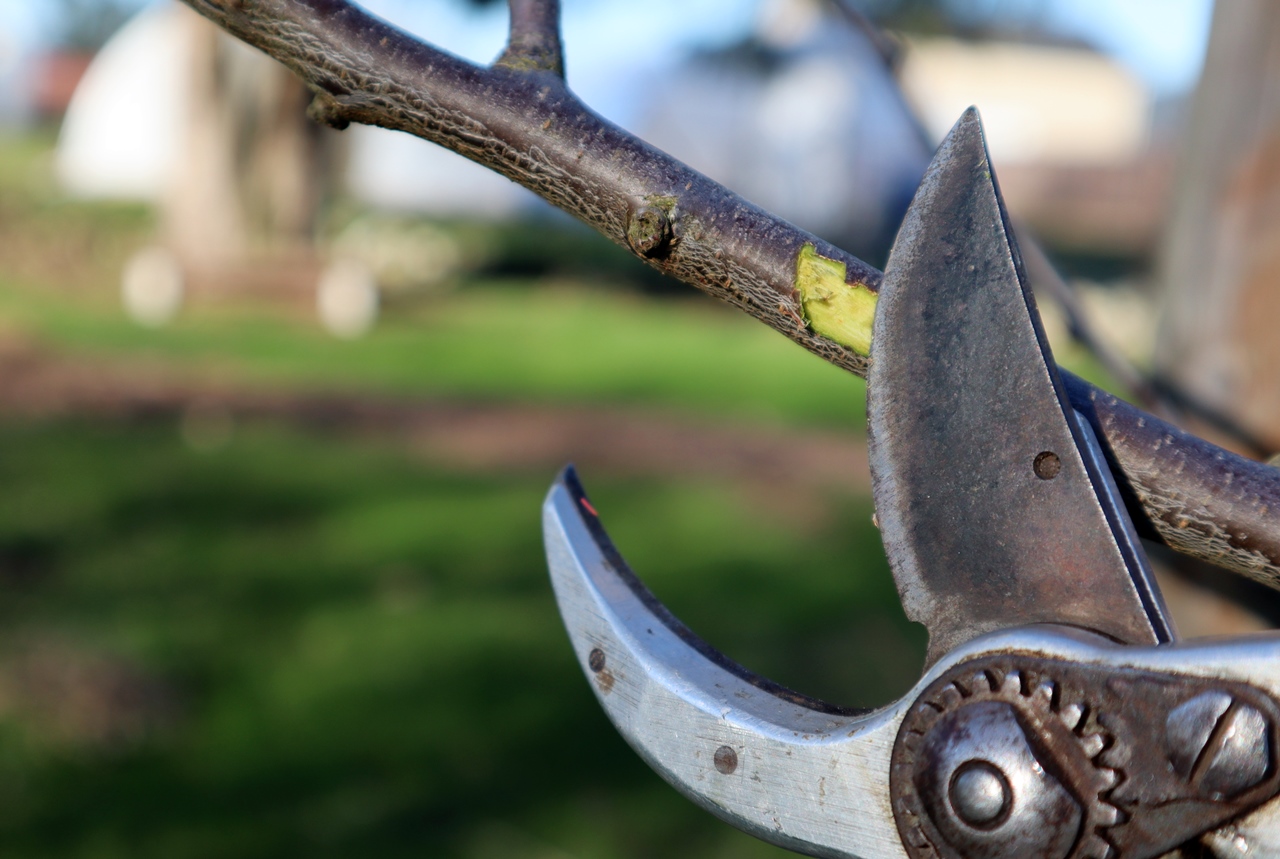
Black, pale brown or grey are bad signs. Another variation of this test is where you’d snap off one of the smaller stems on a tree or shrub’s extremities, and examine the color of the inner bark at the point of the break. This “snap test” also can reveal whether the wood of the stem is still somewhat moist and flexible (alive) or dry and brittle (dead). There’s a demonstration in the video I linked earlier in the article. On perennials the above-ground parts will most often have died back over winter, so any poking and prodding will be focused on the crown of the plant – where firmness is a good sign and mushy or moldy definitely are not!

What to do about it?

If you’ve given it a reasonable amount of time and then confirmed that a plant has died over the winter, there’s little you can do except remove the plant and make new gardening plans. In many cases, however, the cold may have damaged only the extremities, leaving the plant to regrow from its healthy roots and crown. I get messages from concerned gardeners every year asking what else they can do to help bring their plants back from the damage. It might be more a matter of what not to do. Don’t throw an unusual amount of fertilizer at the plant, hoping to spur on aggressive new growth. Excess fertilizer can compound the stress of the injury. There’s little evidence that a B1 vitamin product will help. I wouldn’t hit the plant with a preemptive application of pesticide/fungicide either.

It’s really just a matter of pruning to remove the dead, damaged and diseased parts of the plant, and offering good garden conditions just as you aim to do for all your garden plants. I specialize in roses, but the following video where I discuss how and when to prune back winter damage would apply across a wide range of woody plants:

Finally, it’s worth repeating that not all winter damage is due to the cold itself. If you’re looking to adjust your planning for coming years, it may not be a matter of just cheating down on the hardiness zone map (although that’s not a bad idea when growing in a more exposed location or in a container). I linked this video at the top of the article, but if you’ve come this far I may as well offer it again:

Avoid These 3 Things To Help Your Roses Survive Winter

Roses are built to survive winter

Don’t treat your roses like they’re the fancy dinnerware of the garden. Most are descended from tough, northern climate species, and they’re well prepared to get through the cold of fall and winter – at least in the mild-to-moderate climate of the Fraser Valley. Some of the “special care” that gardeners offer their roses in the lead-up to winter can, in fact, be detrimental to their survival. Don’t kill your roses with kindness! Avoid these 3 mistakes to give your roses a fair chance to survive:

#1: Late season pruning

Lock those pruners and back away from the rose… slowly. It may be tempting to give your roses a good cleanup going into the fall and winter. The leaves are yellowing and falling, the flowers are spent, and the stems are untidy – if not downright overgrown. You might think that your rose has a better chance if you cut it down lower, and send it into the winter with clean stems. You’d be wrong. Let me say this unambiguously – before winter is the wrong time to do structural pruning on a rose.

Why? Look at what winter damage on a rose looks like:

The stems are blackened at the top end – the most exposed tissue to the cold and drying winds of winter. The length of cane damaged will depend on the hardiness of the rose (many varieties have some sub-tropical genes bred in to promote reblooming) and the severity of the winter. In a mild winter, it may be only a couple of inches – in a severe winter, I’ve seen the damage exceed 18 inches!

Now I ask you: if you left your rose unpruned at 3 to 4 feet of height, and you lost 18 inches of stem in a severe winter, how would you feel about it? Not bad, probably. You were going to prune for shape and structure in the spring anyhow. Now how about if you pruned it back low  before winter – say to 18″ from the ground? If the winter damage reaches all the way back to the crown, it’s game over.

As an added advantage to leaving your rose a little untidy over the winter, birds and other wildlife depend on the rose hips and canes for food and protection.

I will add an exception now, just for completeness: there’s no bad time to remove dead or diseased wood from the rose. Also, if there are a few stems that have grown well above any support, and you know that they’ll just blow around and break in the wind, go ahead and prune them back to a reasonable length.

#2: Late season fertilizing

This one is a little counter-intuitive. It seems like a good idea to supply your plants with all the nutrition they need before the harshness of winter. A late-summer or fall application of fertilizer, however, can send your rose the wrong signal.

Those sub-tropical semi-evergreen rose genes I mentioned in passing come back into play here. Some of the best reblooming roses have a tendency to push new growth late in the season. They’re opportunistic growers. If the weather suits them, they’ll keep growing. As of today, November 19th, I still see a dozen or so roses in my garden cheerily flowering and sending up new growth.

In addition to mild weather, they’ll also grow in response to ample feeding and to heavy pruning.

That soft growth has no chance of hardening-off before winter. By far, you’re better off leaving the fertilizer until spring. Here on the rose farm, I stop feeding my outdoor roses in August.

#3: Deep Winter Mulch

The practice of hilling soil or mulch over the crown of a rose is a carryover from advice given to gardeners in very cold winter regions when trying to overwinter roses that are not well suited for their climate. It doesn’t apply well here, and from what I’ve read, it should be applied with caution even in colder climates. Read this article from the University of Illinois Extension for a good description of these methods. The emphasis is on not trapping moisture at the crown of the rose.

I don’t winter mulch anything. We take -10 celsius with heavy outflow winds, and my losses have been minimal. I’m crossing fingers and knocking wood as I write this, but I’m also quite sure that in our wet climate, anything that could hold water against the crown of my roses is not worth the risk.


For those who are more visual learners, here’s a video I made on the topics discussed above:

Showy Rose Hips

Showy Rose Hips

I’ve always said that roses are the hardest working shrubs in the garden. From the earliest in spring, they provide ornamental interest to the garden, plus food and habitat for insects, birds and other wildlife. In the fall and winter, they demonstrate this work ethic with their ripening fruit – the rose hip.

As I write this, it’s early October in my garden. While some of the less sensible hybrid roses are still sending up soft new shoots and flower buds, the species roses have been planning for winter all season: hardening off the wood from this year’s stems, and slowly ripening hips from the clusters of flowers they wore in May and June. If you’re not familiar with the species roses here’s the short explanation: these are the native wild roses from around the world. Unlike the hybrids often seen in gardens, they usually bloom all at once for a few weeks early in the season. Some of my favorites really put on a fall and winter show with their hips.

What’s a gardener to do with all these rose hips?

If you’re like me, I just enjoy them as seasonal decor of the garden. The birds, rabbits and other small critters will snack on them as they soften. I only do minimal pruning and tidying in the rose field in the fall – small birds take refuge in the canes and brambles in large numbers. Sometimes, we’ll have a spell of hard winter weather and the snow and ice will cover the rose hips for a beautiful display.

If you’re a little more inclined to forage for yourself, you can collect the rose hips and use them for tea, syrup, jelly or even wine. They’re sweet and fragrant, with a flavor somewhat like an apple or quince – they’re also very high in vitamin C. Herbalist recommend them for heart health and arthritis – and they’re also supposed to be good for the common cold.

In my opinion, the best hips for harvest are the big, juicy hips of Rosa rugosa:

Some of the rose hips featured in the above video are definitely not for eating. The Scots rose, Rosa spinosissima and its relatives have attractive black or purple hips, but they’re rather dry and mealy inside:

One more rose I have to add a photo of is Rosa roxburghii, the chestnut rose. It’s a very large shrub (almost a tree), with finely divided leaves, and these large spiny hips that distinguish it from all other roses:

Overwintering perennials

Even if you only know me casually, you’ve probably caught on that I’m a bit of a plant geek… I mean, more than just the roses, tomatoes and squash. In fact, my real expertise (at my day job) is regarding perennials. I’ve learned a lot there about how to grow each crop to finish for sales in the spring, but the trickiest growing is on those crops I have to tend through the winter.

I made a quick video about it:

When it really comes down to it, the tricks to successfully overwintering any hardy plant in a container are pretty similar:

  • Start with clean plants – remove dead and diseased foliage early to avoid later problems
  • Protect them from cold winds that would dry their tissues
  • Shelter from the coldest temperatures. For some of the less hardy plants, this may mean heating – but for many perennials in the mild winter climate of the Fraser Valley, this just means a layer of protection (snow, crop cover, or an unheated greenhouse)
  • Try not to let your greenhouse heat up during sunny days
  • Provide decent air circulation
  • Don’t keep the plants wet all the time, but do water ahead of the coldest weather to prevent desiccation
  • Even if you start with clean plants, do inspect them frequently for any signs of disease or rot. As foliage dies down, in most cases, it’s advantageous to trim it away from the plant

And because this is a website about roses, I’ll add this: while I don’t recommend much winter pruning for roses in the landscape, I perform a moderate pruning on the container roses in my greenhouses. Where they have a little protection, they tolerate the winter pruning fairly well – I combine the pruning with stripping off the old foliage. This sanitation protects from winter rot, but also gives new foliage in the spring a fresh start, with no old leaves to carry over black spot or powdery mildew.

And here I am, enjoying a sunny January day in our garden! The days have been getting longer since December 21 – but I recently heard a climatologist quote a different measure: the dead of winter, which sounds more ominous than the way he explained it. The dead of winter, measured by local weather history, is the point in the year when your area has the very lowest average temperature. Every day after that is statistically more likely to be warm. I can buy into that! Here in the Fraser Valley, it’s around January 4th.

So we’re over the hump. As a rule of thumb for me, I begin seeing my greenhouse plants wake up around Valentine’s day. There’s still a lot of winter that can happen in a month, but it’s nice to have the finish line in sight.


Overwintering roses in the Fraser Valley

If you grow roses in BC’s lower mainland, overall you’re pretty fortunate in your climate. Maybe not quite so fortunate as a rose grower in the highlands of Ecuador, but definitely lucky in comparison to a rose grower in Flin Flon, Manitoba. We benefit from a mild maritime climate, four (usually) distinct seasons, and we’re far enough north that our spring and summer days are extended – extra time to enjoy our gardens when they’re at their best! Take that, Ecuador!

As mild a climate as we Lower Mainlanders usually enjoy, we need to be aware of the occasional arctic outflow wind. These weather events are the most dangerous time of year for roses in your garden. Here’s a meteorological definition. If you work outdoors in the winter weather, you’ll notice when the wind begins coming in the wrong direction, from the east instead of the west or south. There’s a particular chill to that wind that will tell you something ugly is on the way.

Some of these arctic outflow storms can be vicious, in a relative way, of course. We’re accustomed to gentler weather conditions here. Maybe someone from Edmonton would scoff at this kind of storm, although I dare say that at the worst of times, when the arctic wind is whipping snow and ice sideways across the Matsqui and Sumas flats, even our brave Edmontonian would rather be inside.

They may happen only a few times a year, there are a few problems these arctic outflow events pose for our roses.

  1. They can come unexpectedly, any time in the winter or even late fall, before our garden plants have really decided to take winter seriously. If your roses haven’t “hardened off” for the cold season, they’re more susceptible to damage.
  2. Low humidity. Cold air holds less moisture than warm air, and wind sucks moisture out of plant tissues faster than still air. The result is that rose canes, especially younger longer shoots, will become dessicated by the wind. This is what causes those blackened shoots when the spring comes.
  3. In addition to sucking moisture faster, the winds also mean that any snow cover that would have been moderating the soil temperature is probably blowing right past the neighbor’s house. Times like this, a little bit of tree cover as a wind break is much appreciated.

I mentioned that roses need to “harden off” if they’re to avoid winter damage. For roses grown outdoors, you don’t have much control over this, except that you probably chose the roses in the first place, and some do a better job of it than others. I went out to the garden today (Nov 20, 2012) to see how the roses are doing. We’ve had a mild fall, and as expected, there are a few roses that are pushing it a bit, still putting up succulent new growth rather than going dormant.

In many roses, bright red stems and leaves mean new growth. ‘Anisley Dickson’ here is also throwing several new flower buds. It’s a bit of an issue with the repeat blooming genes that breeders select for… the rose will continue to put on new growth to support flowering, even when those flowers are unlikely to finish. For roses that don’t know when to quit blooming, an outflow wind can be devastating. The only control you have is to choose your roses varieties carefully.

‘Veilchenblau’ is a tough rambler rose. Even if it takes some damage through winter, it’ll put on a good show next year. In this picture, you can almost feel how soft this wood is. This is an example of a rose that’s so vigorous, it can go ahead and risk continued growth because it’s strong enough to thrive even if winter knocks it on its butt. What I’d rather see:

This is ‘Emily Grey’, a whichuraiana climber. This rose is in an exposed position along the back fence of our farm, and it looks like it takes the threat of winter seriously. Remember I wrote earlier that the color red in rose stems can indicate new, soft growth. That’s not the case here – this rose variety has wood that matures to this handsome mahogany color. Notice the buds are tight at each node, and ‘Emily Grey’ has even dropped it’s leaves.

Not all roses will drop leaves before the winter. Here’s one that has fully hardened, but is still holding onto its foliage:

You’ll have to take my word on it that the stem this specimen of ‘Complicata’ is completely hardened off. I show this to emphasize that the leaves don’t need to drop for a rose to be ready. The firmness (maturity) of the wood is what counts. Don’t be tempted to strip the leaves from your roses. It’s not only unnecessary, but probably does more harm than good by depriving the rose of the chance to finish the season in an orderly manner. When the leaves drop naturally, the attachment point is protected. Human hands pulling off leaves may cause injury, and give disease organisms a nice opportunity to get in.

So what do you have control over?

  • Your choice of roses. Hybrid teas are some of the tenderest varieties, and many gardeners in the rest of Canada don’t even attempt them. Look up the rose’s profile on helpmefind.com and look for the climate zone of hardiness. Most of the lower mainland is comfortably in zone 7 or 8, but you may want to choose a rose that’s good to zone 5 or 6 if you have an exposed site.
  • Location within the garden. You’ll have trees, shrubs, fences, hedges and buildings to take into account when you choose a spot for your roses. Remember that the worst of the outflow winds will be coming from the east, so place your tenderest roses to the west of something that can dampen the wind. I haven’t mentioned a whole lot about moisture in this posting, but if you’re choosing a site for a rose anyhow, be mindful of where there’s decent drainage. Even a hardy rose won’t stand a chance if it’s sitting in a puddle all winter.
  • Pruning and fertilizing. I tend to do most of my rose pruning in the early spring, when I can take out any canes that have been damaged by the winter. I keep on pruning most of the summer, shaping and tidying whenever I’m walking by a rose and have the pruners in my hand. Somewhere around August I ease off. It’s best to give this year’s growth some time to harden off. If you cut back too hard late in the season, the rose will likely respond by sending up more soft shoots. Likewise with fertilizer. A well-fed rose wants to grow and bloom, so I cut off the food supply in august as well.
  • Mulching. I put a 3 or 4 inch layer of oak leaves ( I just happen to have a fairly large oak tree on the driveway) at the base of my roses. It moderates the soil temperature. In the spring it can be chopped and worked into the soil to add organic matter. Most any loose mulch will do. I’ve seen recommendations for tender roses to build a wire mesh cage around the entire plant and cover with a foot of mulch. It might work, too, but my initial thought is that if you need to go this far, you’ve chosen the wrong rose.
  • Protect your containerized roses. It’s just a matter of choosing the best location you have available, and making it work. My cold frame greenhouse works pretty well, but not everyone has a greenhouse. A friend of mine (who has many more roses than I do) overwinters his container and tree roses in his garage, and it works beautifully. Do you have a back deck with some shelter from the wind? Can you collect them together under an outdoor stairway, or in the corner of the yard where they’ll get protection from the hedge on two sides? If you keep them outside where there will be wind, keep them bunched together so that they’ll provide some protection for each other. If you do find an indoor/greenhouse space, just be cautious about watering. Wait until the pot is relatively light and dry before watering fully. They’re not going through much water when they’re (semi) dormant, so don’t drown them.

All right. We’ve done what we can. Fingers crossed everyone?

Don’t stress. Roses are a lot tougher than they look.