What does it take to be a rose hybridizer? As it turns out, mainly patience. Don’t get me wrong – I’m sure the top-tier rose breeders also bring a wealth of knowledge and a keen eye for quality to the endeavor, but the basic techniques themselves aren’t complicated to understand. Once you know the steps, it’s just a matter repeating the process until you produce the rose you always imagined (or one you never knew you wanted!), but each attempt can take years to evaluate. So yeah, patience!
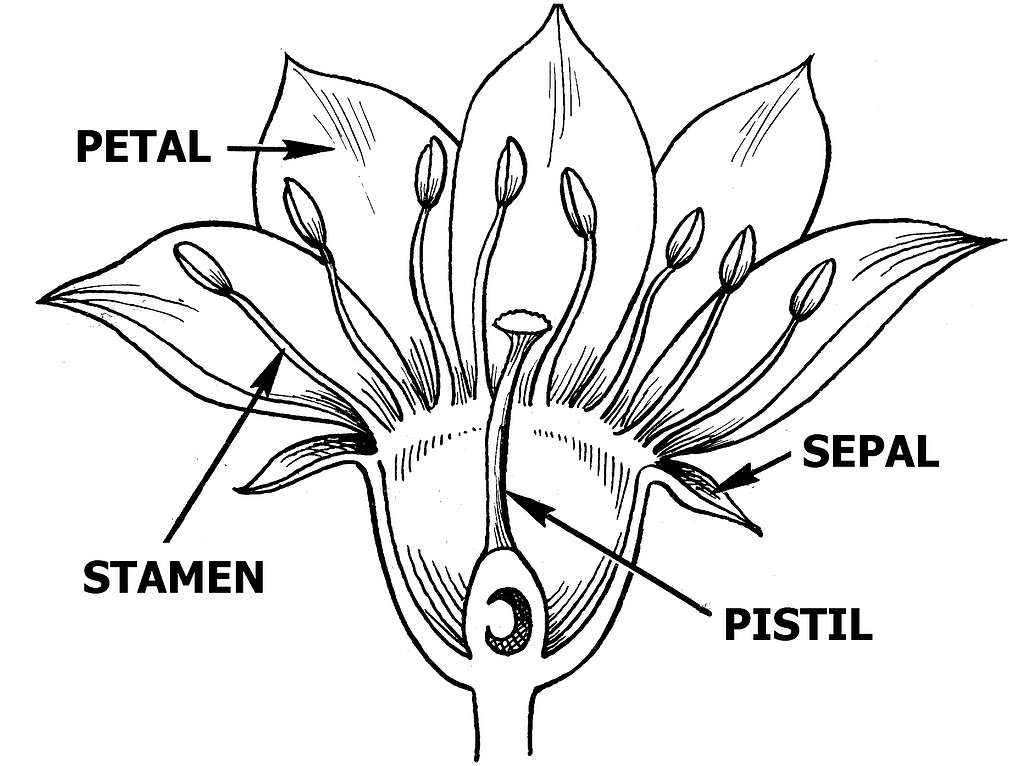
You aren’t going get far into the hobby of hybridizing roses without knowing just the basics of flower anatomy. The birds and bees, so to speak – although with roses it usually has a lot more to do with bees than birds. In the above diagram, the male parts (bearing the pollen) are called the stamen, and in the center of the flower are the female part that will develop the seeds.
Your goal is to collect the pollen from one selected parent, and transfer that pollen (when ready) to the seed parent without giving the bees a chance to interfere with their own pollination efforts.
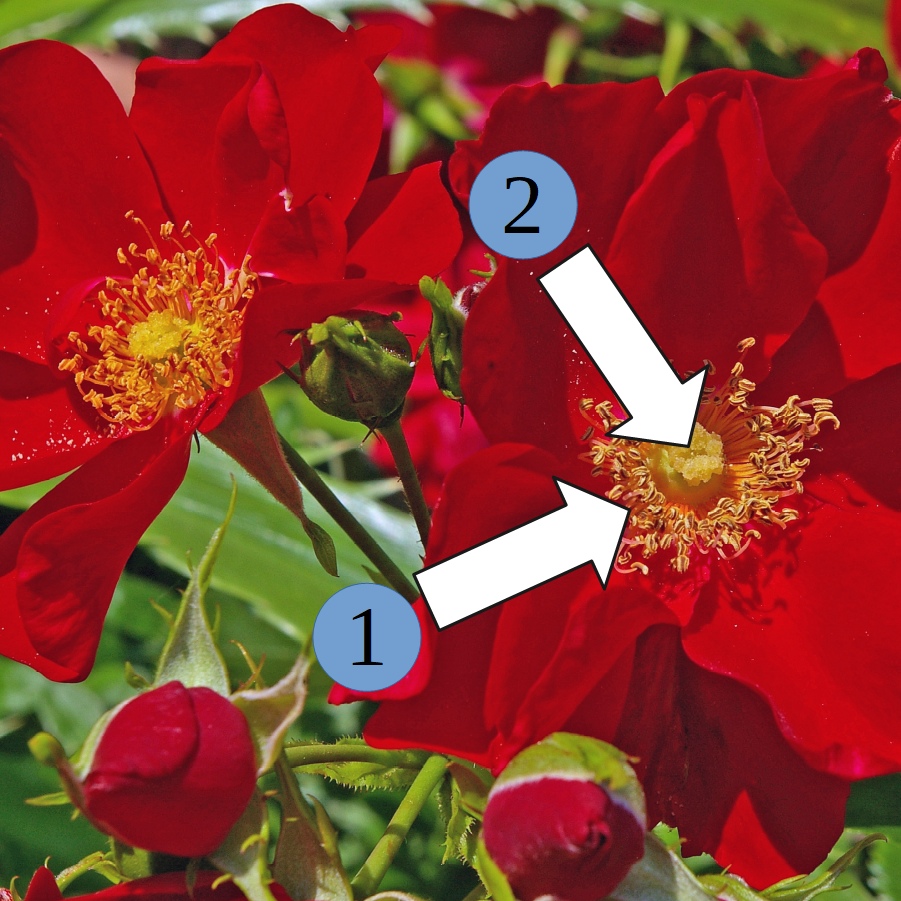
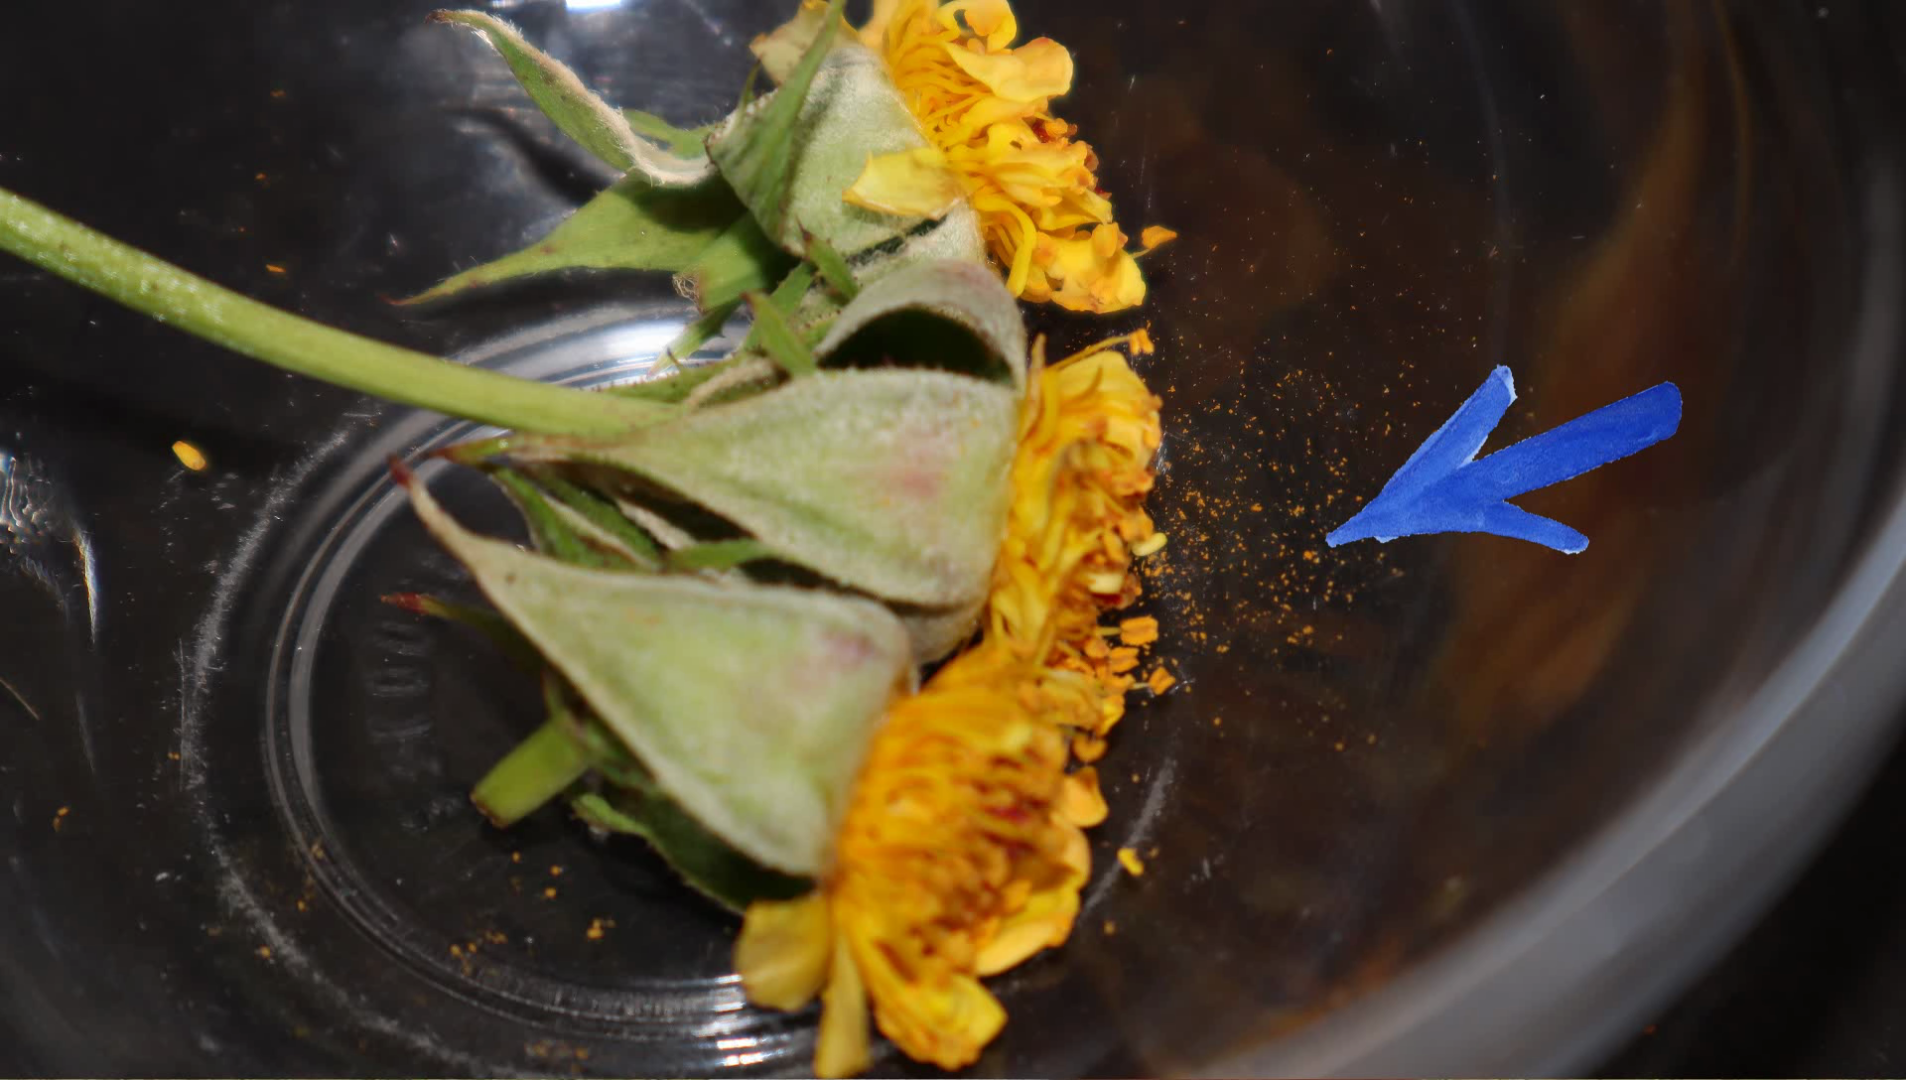
By the time your rose is at the stage you see in this picture, you’re too late! You can see the outer ring of stamens (labeled #1) and the central pistil (labeled #2) and how perilously close they are to each other. If you look really closely at the other flower, you’ll also see the yellow flecks of pollen that have dropped onto the petals. Imagine how easily a visiting insect could fertilize the flower with its own pollen! For you to avoid this risk, you’ll have to get there before the flower even opens.
Step 1: Collect the flowers of your chosen pollen parent
Timing: Morning of Day 1
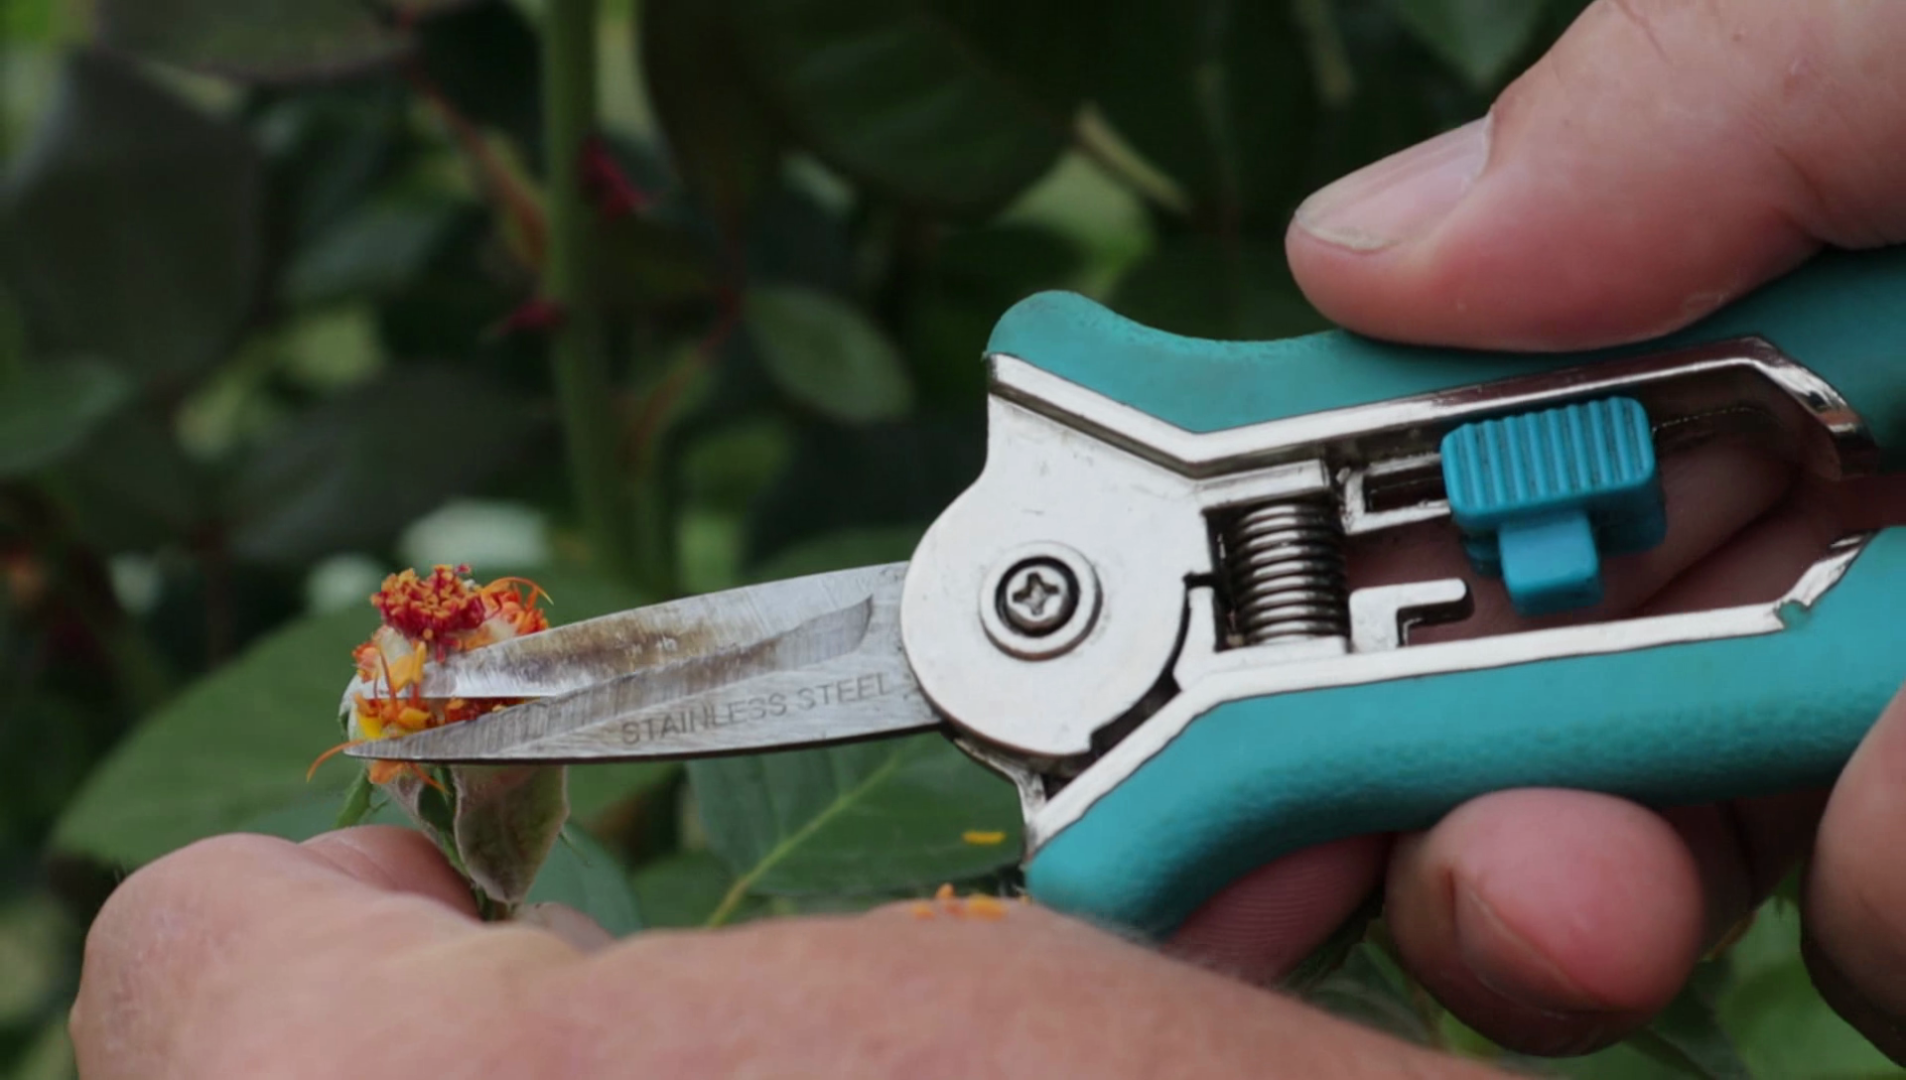
Collect flowers that are nearly open. The petals will still be “closed” around the pistil and stamen, but loosely enough that you can force them open. Because you’ll be using these flowers for their pollen, you can cut them right off the plant. Trim the petals away at this point.
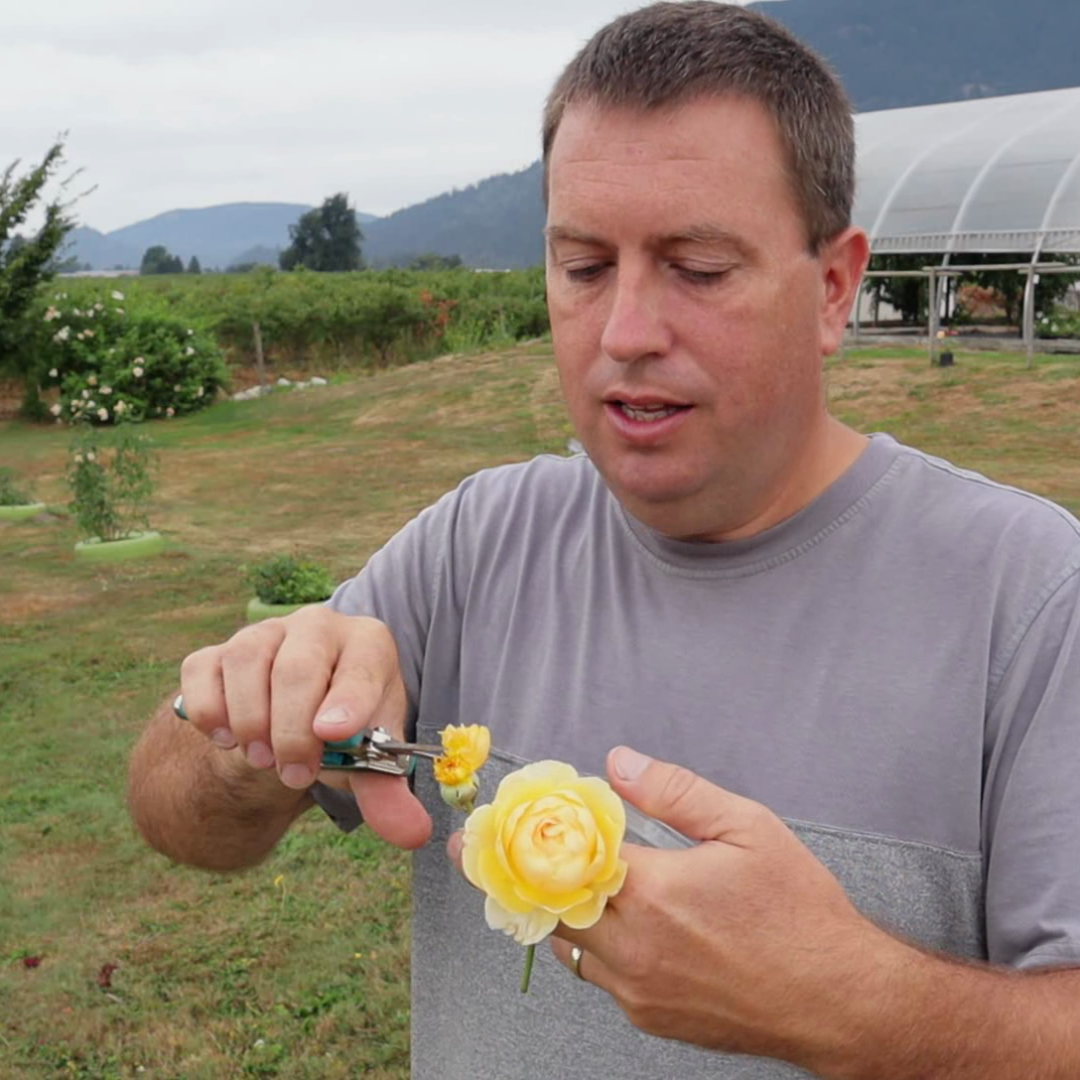
Some people will just cut off the top “sacks” from the stamens (called anthers) at this point, but I was taught to just leave them on the flower so as to use the whole things as a “brush” when applying the pollen. The pollen may not be ready right away, but if you collect these flowers into a small container, you should begin see the release of pollen within a few hours.
Step 2: Prepare your chosen mother rose
Timing: Morning of Day 1
The flowers of the seed parent (mother) need to remain on the plant because after pollination it will take around 3 months to develop ripe seeds. Again, select flowers that are still closed, but that the petals are loose enough to work open. For this flower, remove both the petals and the stamens.
At this stage, the pistil may not be quite ready to accept pollen. That may happen as early as the same day or up to a couple of days after petal removal.
Step 3: Transfer the pollen
Timing: Afternoon of day 1, repeat for the next 2 or 3 days to be sure
This really is as simple as using the flower of the pollen parent (you collected this in step 1) to brush the pollen onto the pistil of the mother plant. I usually do my first transfer on the afternoon of the first day, and then try again a few times over the following days just in case the mother plant wasn’t ready yet. You can also brush the loose pollen on with your finger if a lot has released from the pollen sacks.

Now’s the time to label your cross. I use a plastic loop tag with the name of the pollen parent and seed parent. Yes, you can probably figure out the seed parent anyway (because the flower is still attached) but I note it down anyway because I figure I could get lazy about it at the time of seed collection.
Step 4: Collect and plant the seeds
Timing: Around 3 months later
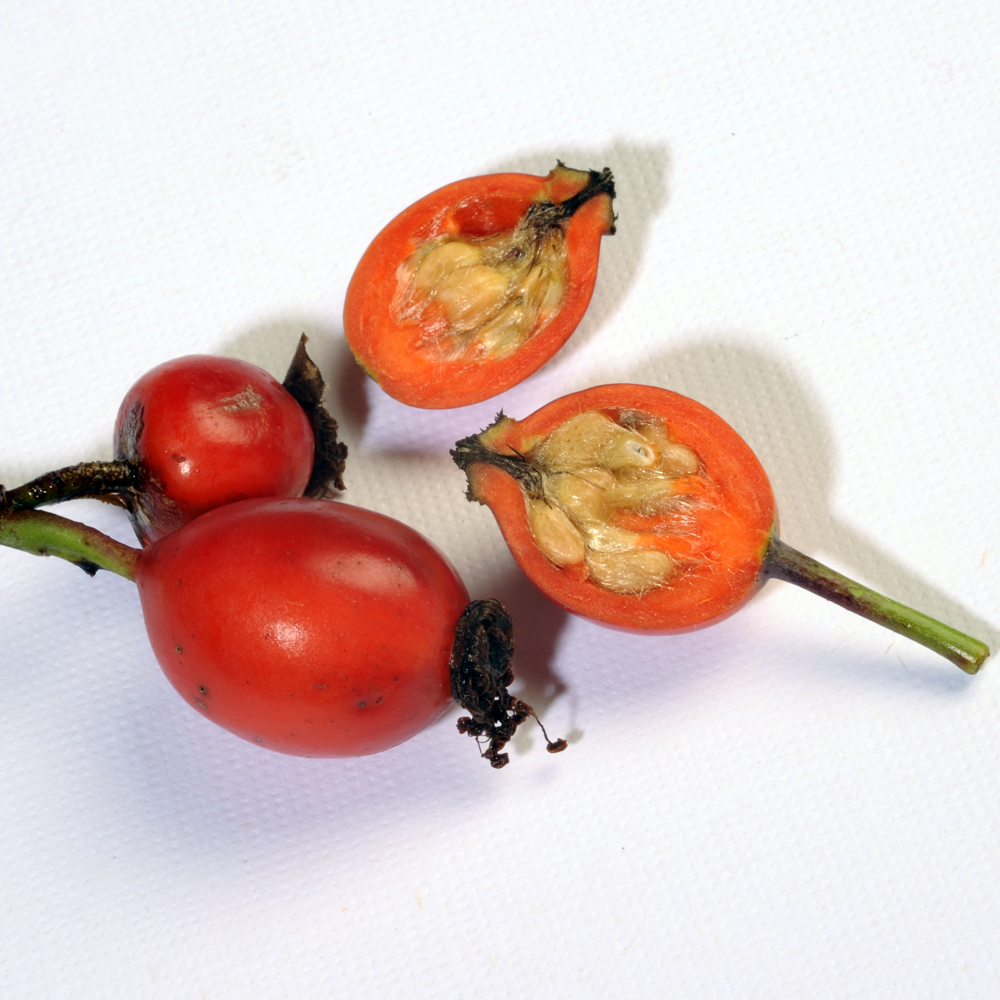
The fruit of a rose (called a hip) will develop and ripen over the course of the season. Most varieties have hips that turn orange or red when the seed inside is ready to be harvested.
Some roses make good mothers and develop lots of seeds. Others are less prolific. Some roses are more or less compatible with each other than others at pollen or seed parents. This is my gentle way of tamping down the expectations that you’ll get a lot of viable seeds from each crossing. It could be zero, it could be just a few, and it could be upwards of 30.
Roses program their seeds to require a period of cold & moisture (called stratification) before they’ll germinate. In nature, this would be a winter after the hips have dropped and broken down in the soil. Don’t just leave the hips on the rose for the winter and then try to germinate them the next spring. Seeds in the hips are inhibited from this stratification even if they withstand a long cold winter on the shrub.
Sow them in a seedling tray with potting soil and leave them in a sheltered place outdoors over the winter. Alternately, place the seed tray (or just the seeds in a ziploc of perlite, sand or vermiculite) into the fridge for up to 3 months. You should check occasionally to make sure they haven’t started to germinate in the fridge (sometimes they do!)
Here’s a video I made about growing roses from seed:
What should you expect from the seedlings?
Okay, so the steps weren’t too complex (I hope – if they seem that way, it must be my explanation!). They do take some time, though. You may have already counted a minimum of 3 months for seed ripening, and 3 months for stratification/seed germination. What’s more, you may not see significant flowering on the new seedling in the first year of growth. It may throw a few small flowers, but they’re generally not the best examples of what the baby rose will produce when it’s mature.
Will it flower like the chosen plants? Not necessarily. This is where the complex genetics of roses comes into play. Even a self-fertilized rose can look and grow quite differently than the mother. If you imagined rearing a seedling that reproduces the perfect form of Parent A and the outstanding fragrance of Parent B, that’s a wonderful goal – but it’s likely to take more than a few tries to get close to the ideal! Some larger breeding program germinate thousands of seedlings every year in the hopes of introducing 2 or 3 roses after years of evaluation.
So expect something unexpected. I say none of this to discourage you. Far from it! Some great roses have been bred in small batches by amateur breeders. Also, it’s reassuring to know that all the biggest names in the history of rose breeding started out with a single act of cross-pollination.
If you’re looking for some guidance about which roses make good seed parents, pollen parents or what classes of roses are most compatible genetically, there’s thankfully an excellent forum of rose hybridizers to support the hobby.
Just to finish off this article, I’ll mention that I’ve put basically the same steps and information into the following video: